
CSS Selectors in GTM and Element Visibility Trigger
Updated 11/21/24 – It’s possible to create Google Analytics event data based on what is visible on the screen. We can do that with the element visibility trigger in GTM. And to use element visibility, we also need to know how to use CSS Selectors. This is a non technical guide about CSS Selectors and the element visibility trigger for any non-developers out there.
There’s also a bonus resource at the end of this guide if you want to see another handy application for CSS Selectors in Google Tag Manager.
When Might We Use CSS Selectors and the Element Visibility Trigger?
The practical use case for this guide is tracking a successful form submission.
Form submissions can often be tracked with a thank you page. This particular short form doesn’t use a thank you page. Some form plugins (like Contact Form 7) don’t redirect to a thank you page, but can be tracked with a custom HTML form submit listener and a custom event trigger. In some cases, however, we don’t have either of those options.
One of those unique situation is the email newsletter signup for the monthly newsletter on this website. You can check out the embedded video below or read on.
Still here? Great! You can probably see the email newsletter sign up to the right of where you’re reading now.
Here’s an example in the red box in the image below.
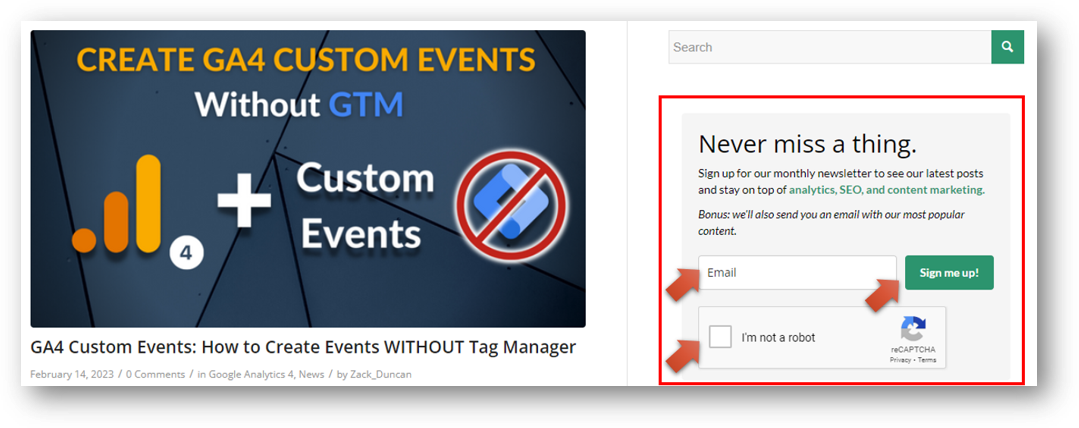
Signing up takes an email address and confirmation of one’s non robot-ness. After that, the thank you message below appears on the screen. Critically, the URL *does not* change.
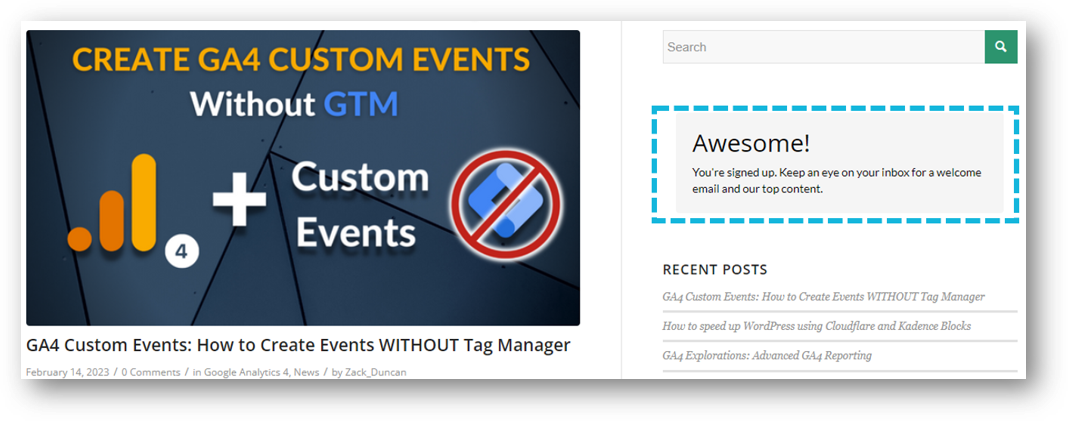
This is a great time to see if we can use element visibility to track when this thank you message appears. To do that, we will need to identify the CSS Selector associated with the thank you text. But since this is a non technical guide for non-developers (like this author) let’s start with a quick review of CSS Selectors.
CSS and CSS Selectors
CSS is a programming language. The acronym stands for “Cascading Style Sheet” and this particular language is used to control the layout and formatting of a webpage.
What is a CSS Selector?
CSS Selectors function as a set of “rules” for selecting elements on the website. These selectors are used to apply styling (layouts and formats) to the selected HTML elements. While CSS Selectors are used for styling, the same selection mechanism can be used to target HTML elements in the digital marketing ecosystem.
In this way, we can think of CSS Selectors as means of providing directions to an address at a specific location. As a page loads, CSS Selectors identify which elements will get what specific styling. That’s as technical as we’re going to get in this article, but if you’re curious about getting more in-depth with what happens during a page load, you can read this overview of GTM page view triggers including the DOM-ready trigger.
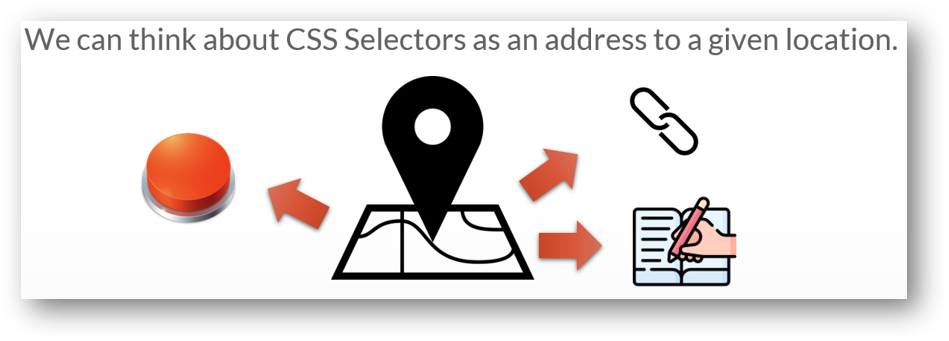
Elements like a button, a link, or specific text on a page will have a CSS Selector (or Selectors) associated with them. We can use that CSS Selector to help with our digital targeting.
How Do I Use CSS Selectors in Google Tag Manager?
CSS Selectors are used in conjunction with the element visibility trigger in Google Tag Manager. Once the CSS Selector (or Selectors) has been identified, you paste it into the “Element Selector” field. You can see that in the red box below. You’ll need to ensure the “Selection Method” is set to CSS Selector (first red arrow at top). You’ll also need to choose how often to fire the trigger. As you can see below at the second red arrow, we’ve set this trigger to fire once per page.
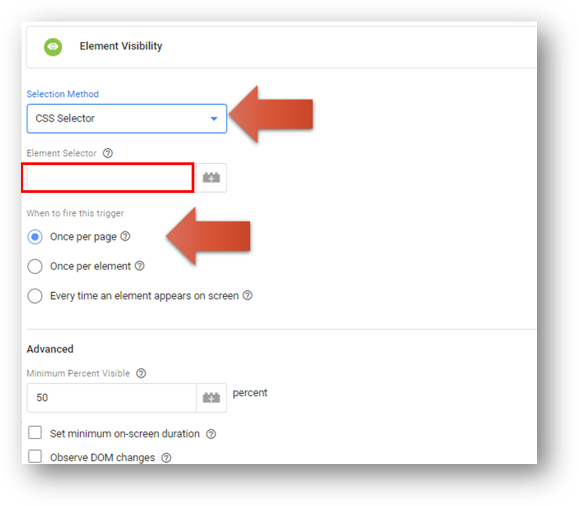
There are other configuration details we’ll review further in this blog, but this shows the basics of how CSS Selectors and element visibility work together in GTM. The confusing part can often be finding the CSS Selector to use in your trigger. Check the embedded video above for a click by click walkthrough, or read on below.
How Do I Find CSS Selectors?
You can find CSS Selectors by right clicking on the element you want to track and then inspecting the element.
Check out the example below. We want to track the text of the confirmation message that starts with “You’re signed up…”. When you right click on this text, you’ll be able to Inspect the element as you can see below.

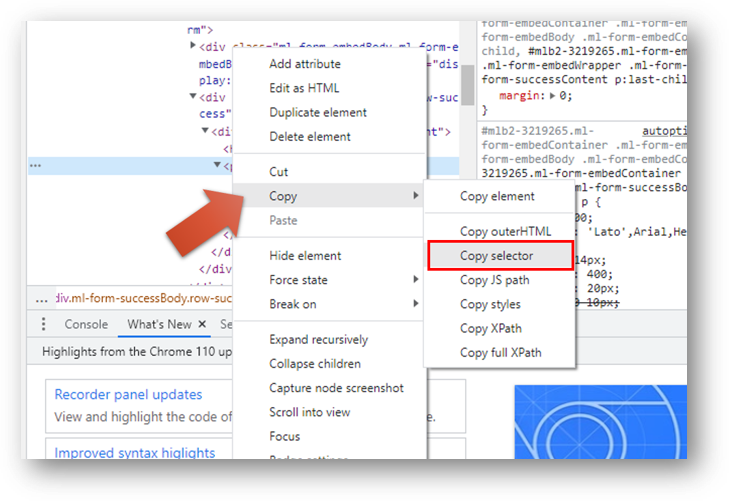
Now, identify that specific CSS Selector from Chrome Developer tools. Copy the Selector. Paste it into your element visibility trigger.
Note: when you copy the Selector you’ll need to open the Copy menu and then select “Copy Selector.” You can see that below. Or, if you haven’t watched the video above, just go to the 3:00 minute mark to see precisely how to do this.
That should be all the “hard” parts of the process. If you want a few more steps check out below.
Create The Element Visibility Trigger in Google Tag Manager
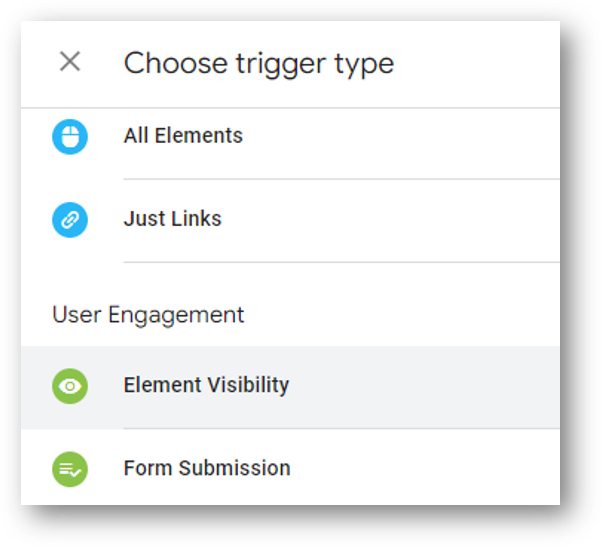
Starting from scratch? Create a new trigger. Select “Element Visibility” under “User Engagement” as the trigger type.
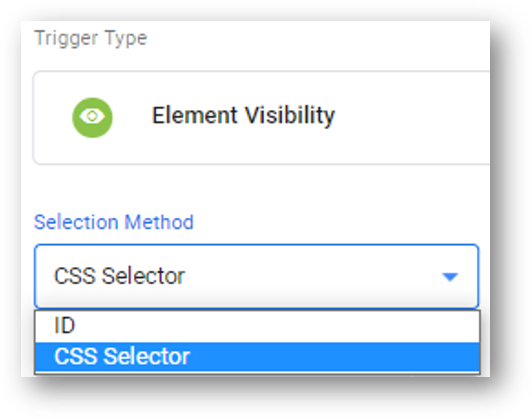
Change your Selection Method from ID to CSS Selector.
Once you’ve done this, it’s time to pull in the CSS Selector detail you already copied.
Finish Configuring Your Element Visibility Trigger with Your CSS Selector.
Paste your CSS Selector into the Element Selector field in your trigger. If you need help finding it, just look for the massive red arrow below. ; )
Determine when to fire the trigger. This trigger is set to fire once per page.
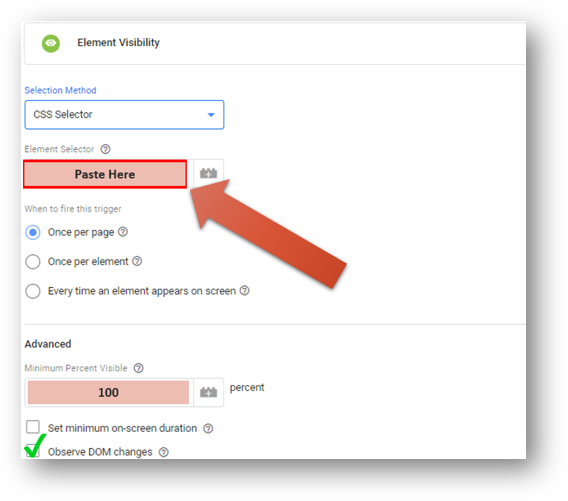
You may also choose to use some of the Advanced configuration details. You can change the Minimum Percent Visible. The default is 50% but I’ve changed it to 100% in the example above. Also, if you’re tracking something like the newsletter submission example, you may need to select “Observe DOM changes.”
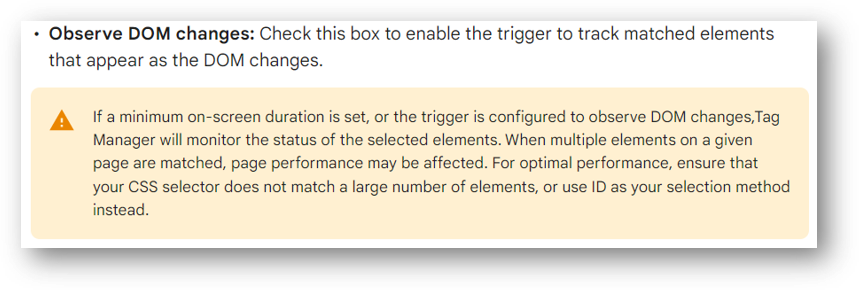
As Google says in this support article, you should check the box to observe DOM changes to “enable the trigger to track matched elements that appear as the DOM changes.” You should also check out the warning below in the yellow box so you can monitor your site for any performance issues should you do this.
Create Your GA4 Event Tag and Pair it With Element Visibility Trigger
The Element Visibility trigger is great but without a corresponding GA4 event tag, you won’t be sending any data into GA4.
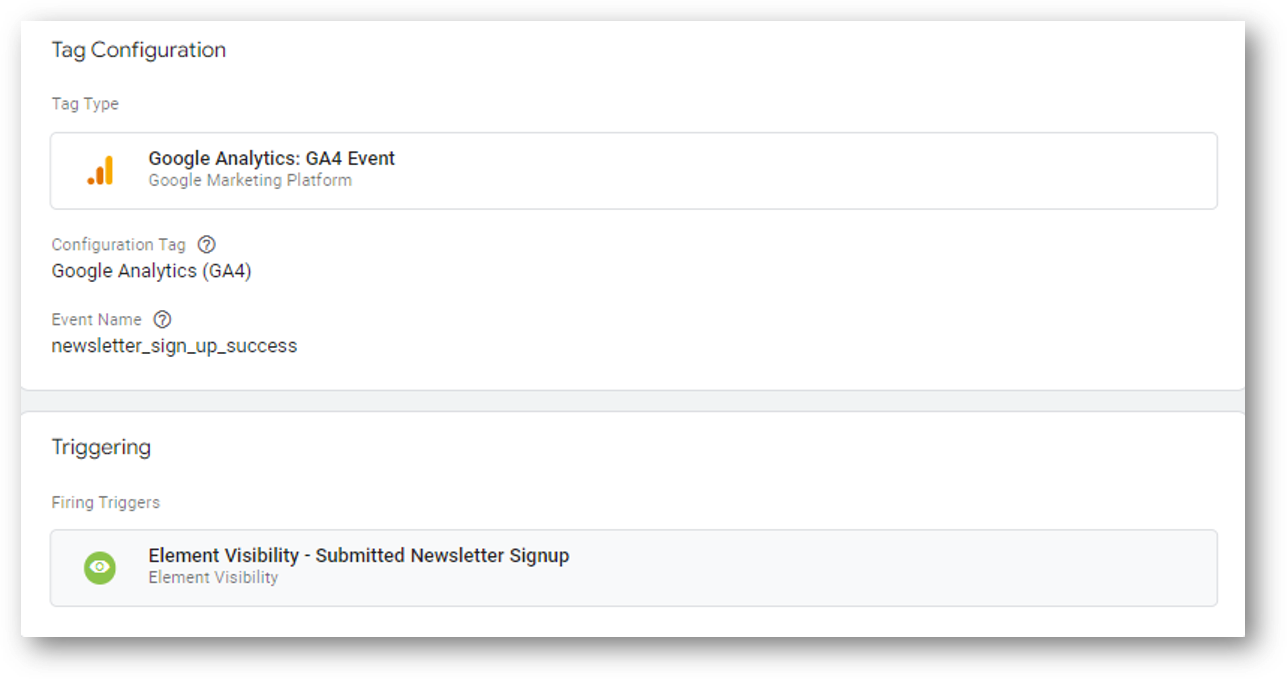
As you can see below, we’ve created a tag called newsletter_sign_up_success that will create event data in GA4 with the same name. This tag needs to be paired with our configured trigger in order to work properly.
In this case, we have not set any event parameters in our tag. You may want to do so, depending on your specific tracking goals.
A Note About Event Parameters in GA4
An event “parameter” is a piece of data that adds additional context to a web interaction (an “event”). In our example, the newsletter submission is called newsletter_sign_up_success. The event will register and record data each time the event occurs. But if you want to see additional information, you’re talking about the realm of event parameters.
When you’re creating GA4 event reports, you’re typically going to want to view both your event data and relevant parameters. If you want three simple ways to create GA4 event reports, this article has you covered.
Another Way to Use CSS Selectors in GTM
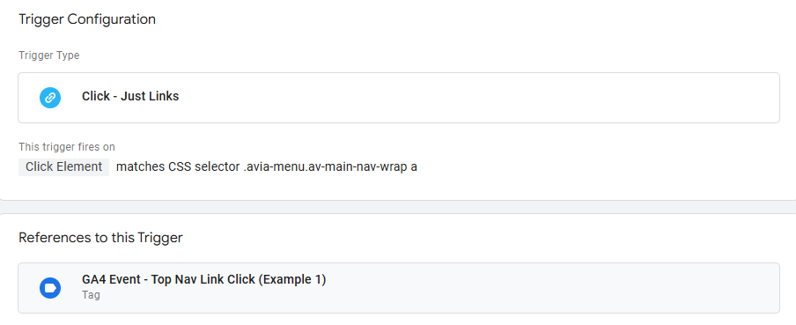
You can also use CSS selectors in GTM along with Click Element to track specific clicks. One common situation would be when you want to track clicks to see how visitors are interacting with your primary site nav. CSS Selectors can target all of those navigation clicks, or just a specific portion of the navigation hierarchy depending on your goals.
This is what a configured Click trigger looks like that looks for a matching CSS selectors.
You can check out this video for a step by step walkthrough. Have fun!
For more GA4, feel free to check this list of updated GA4 questions.
About Root & Branch
You can learn more about R&B here. Or hit the button below to check out YouTube for more digital marketing tips and training resources. Thanks for coming by.

")


Leave a Reply
Want to join the discussion?Feel free to contribute!