
GA4 Click Event
Updated 12/27/24: The GA4 click event is an enhanced measurement event that Google Analytics can track automatically. But it doesn’t track all clicks on its own.
In this article we’ll review what the click event tracks and explain how you can also track other important click events.
We’ll look at the following:
- Does GA4 automatically track clicks?
- What is the GA4 click event?
- Where to see click data in GA4?
- How can you track internal link clicks in GA4?
- How to create your internal link click tag
- How to create your internal link click trigger
Let’s start with what GA4 will do for you by default.
Does GA4 Automatically Track Clicks?
GA4 will automatically track some clicks. These automatically tracked clicks are outbound link clicks that leave the domain.
These automatically tracked outbound link clicks are tracked through the enhanced measurement ‘click’ event.
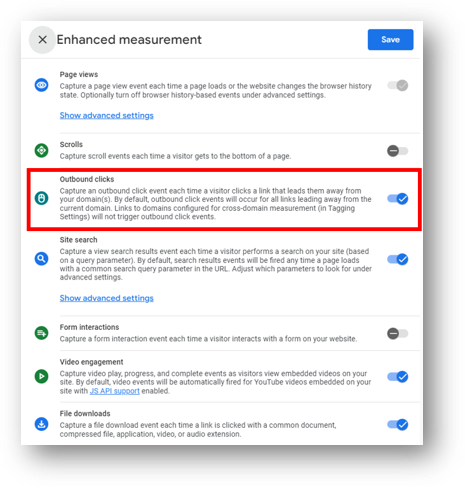
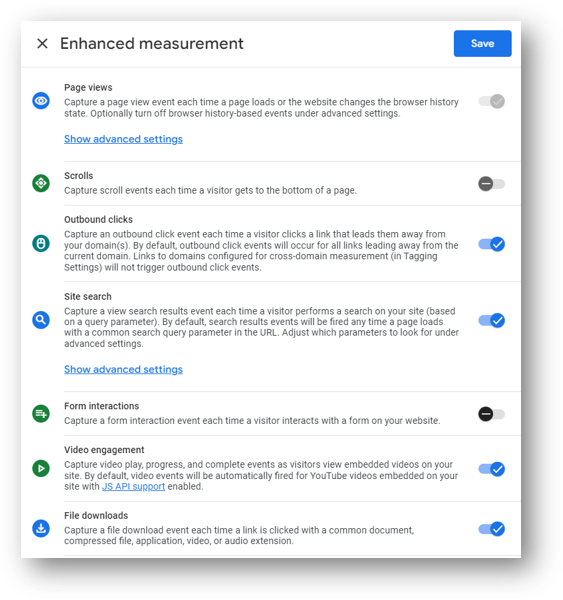
By default, the “Outbound clicks” enhanced measurement event will be turned on in your data stream. As long as the blue toggle switch is turned to the right as it is below, your property is tracking these link clicks through the ‘click’ event.
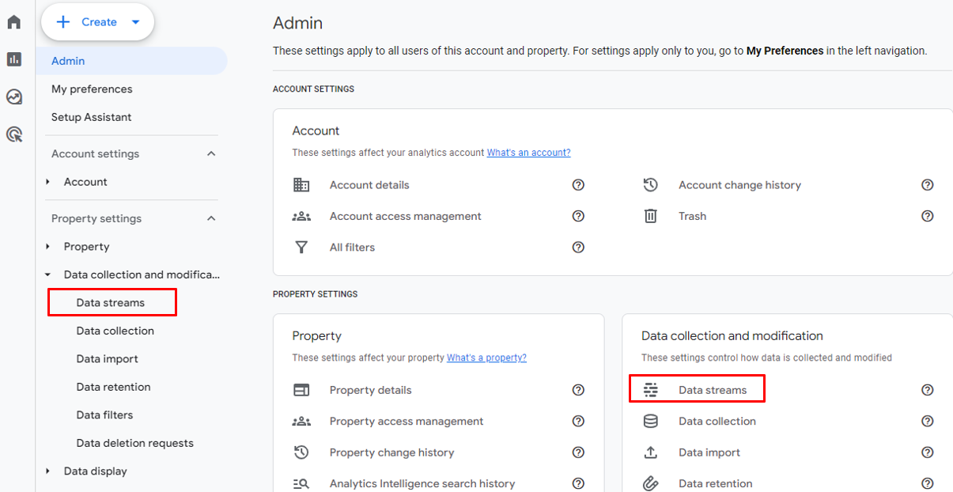
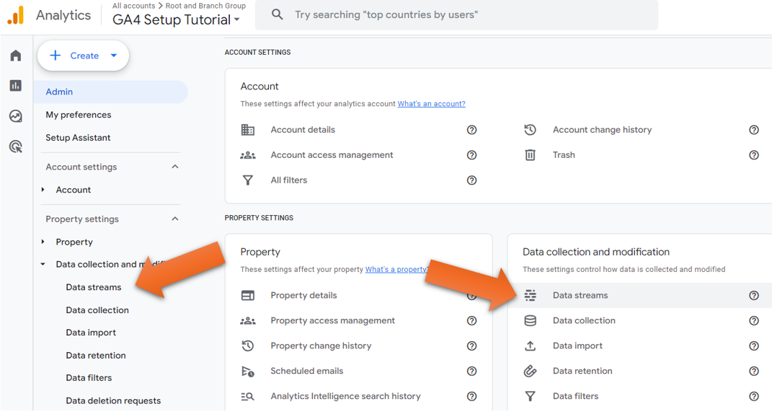
If you want to verify this for yourself, click into the “Admin” settings. Then, click “Data Streams”. You can find it either in the left-hand admin navigation or in the middle of the page under “Data collection and modification.”
Like below.
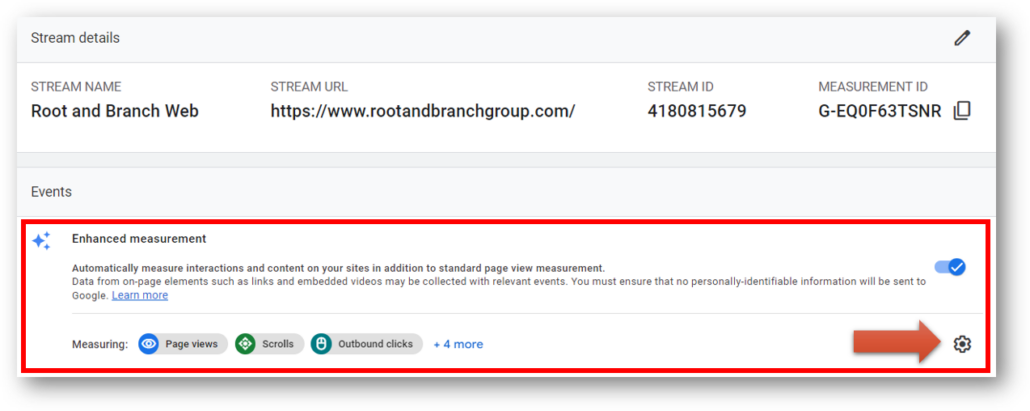
After you click into your specific data stream, ensure that the blue toggle switch for “Enhanced measurement” is turned on. This is the default behavior in GA4 unless you have turned it off. Then, click the gear icon to control your list of individual events.
The “Outbound clicks” field is the third item on the list. As long as the blue toggle switch is turned to the right, the ‘click’ event will record data.
Here’s where you can see those link clicks.
What is the GA4 Click Event?
The GA4 click event is an enhanced measurement event that will fire whenever there is an outbound link click that leaves the domain.
There are 5 event parameters that are created with each ‘click’ event. An event parameter in GA4 is a piece of data that adds additional context to an event.
The additional context from these parameters help you to understand your click events. Here they are as described in this GA4 support article:
- link_classes – this event parameter populates the Link classes dimension in your reports
- link_domain – this event parameter populates the Link domain dimension
- link_id – this event parameter populates the Link ID dimension
- link_url – this event parameter populates the Link URL dimension (very helpful)
- outbound – this event parameter populates the Outbound dimension (doesn’t tell us anything we don’t already know)
Where to See Click Event Data in GA4
You’ll see the event named ‘click’ in your GA4 reports. Each time there is an outbound click on your website, the ‘click’ event will fire and your event count will increase. Here’s how you can find that data in your standard reports.
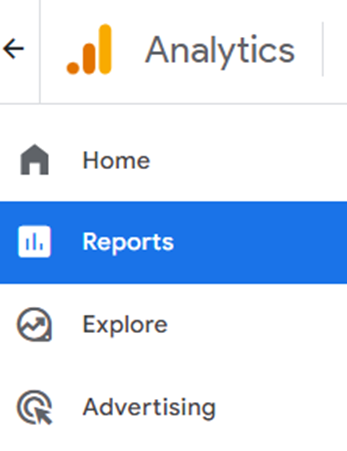
Click “Reports” from the left-hand navigation.
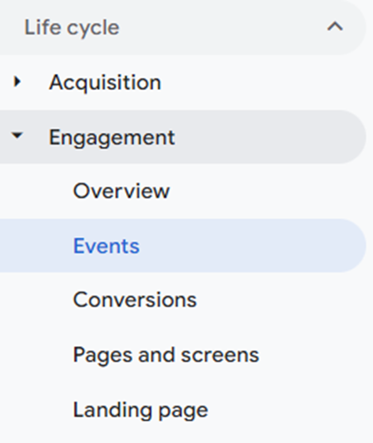
Then, click “Engagement” within your Life cycle reports.
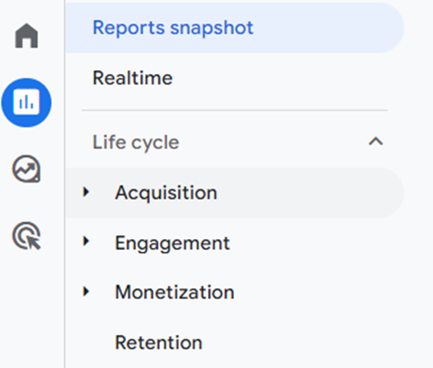
Click, “Events” to see a full list of your event data.
Like below.
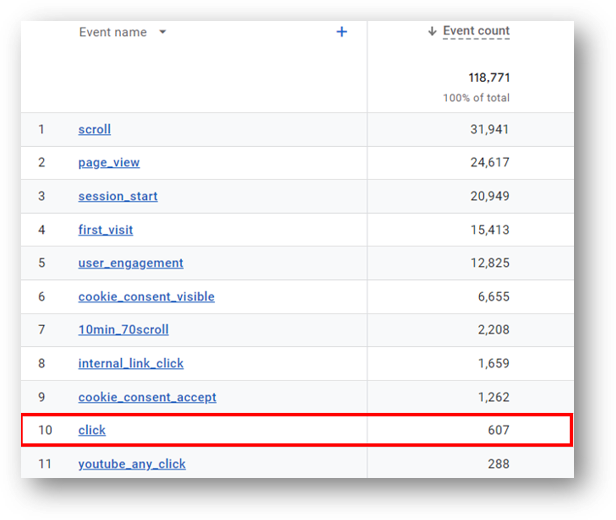
With this information you can keep tabs on your total number of outbound link clicks. That’s helpful to know, but it’s only part of the picture. For more actionable data, you’d want to know your complete link click picture. That means tracking your internal link clicks and then creating reporting that can show you all link clicks.
Let’s now look at how you can use Google Tag Manager to track internal link clicks. By following these steps, you’ll be able to create an event called internal_link_click like you see listed as the 8th event in the report screenshot above. You’ll also get more information below on how to create a comprhensive link click tracking report to see all your link click data in one place.
How to Track Internal Link Clicks in GA4
To track internal link clicks you’ll first want to make sure Google Tag Manager is running on your website.
Once Google Tag Manager is installed, go to tagmanager.google.com. You’ll create a tag and a trigger and then publish your changes to track internal link clicks.
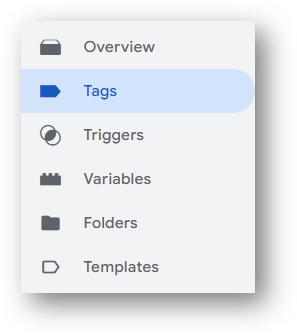
Let’s create the tag first. Click “Tags” from the left-hand navigation.
Then, click “New” to create brand new tag.
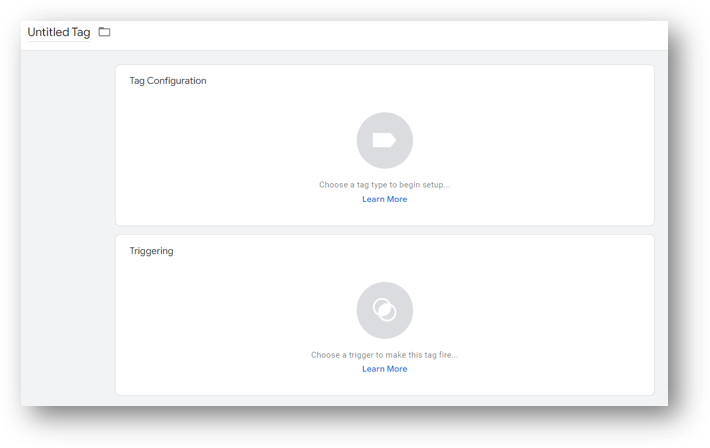
You’ll see something like the screen below. Where you see “Untitled Tag” you can create your own name for your organization with GTM. A name like “GA4 Event – Internal Link Clicks” would work just find. Then, click anywhere within the “Tag Configuration” area to choose your tag type.
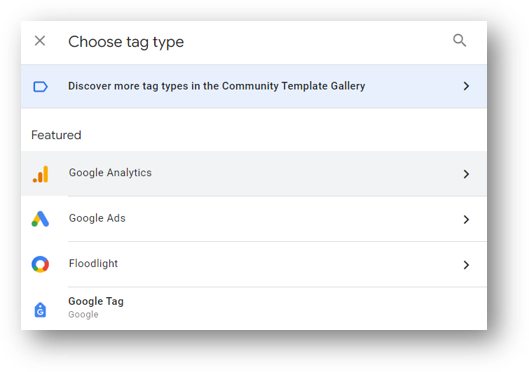
You’ll see a number of tag types to choose from. Select “Google Analytics” from the top of the list.
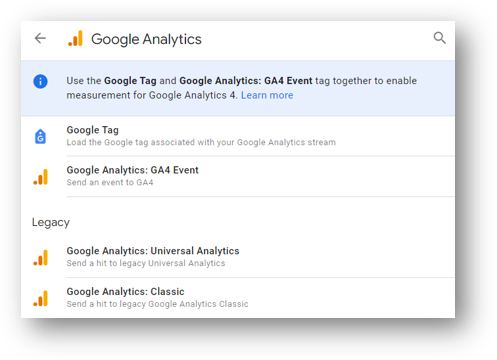
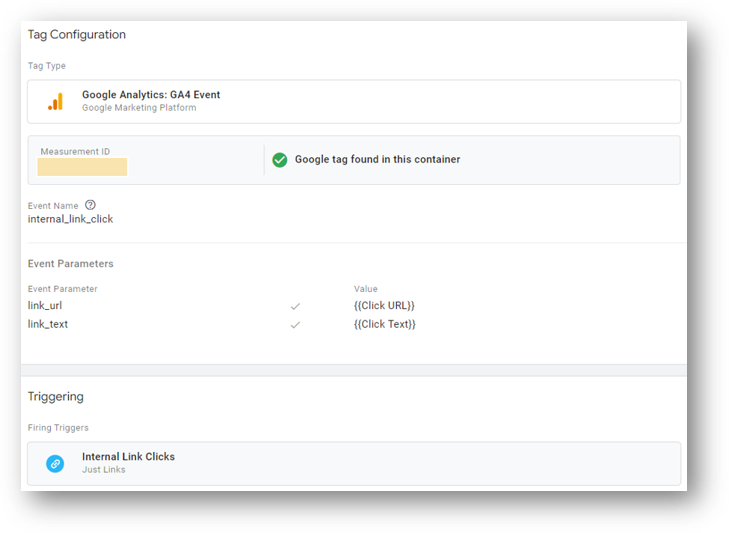
You’re going to create a GA4 event tag for your internal clicks. So select “Google Analytics: GA4 Event.”
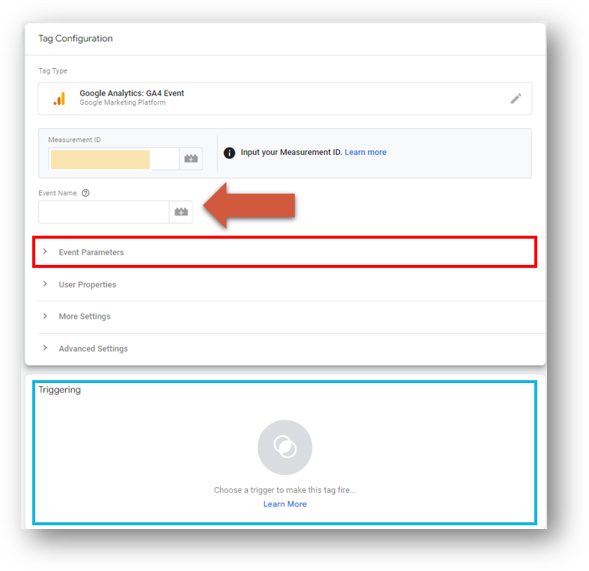
You’ll see something that looks like this below. You’ll need to do three things in configuring your tag before you move on to your trigger (blue border).
- Enter your Measurement ID for your GA4 property (light yellow rectangle)
- Give your event a name that will show up in your GA4 reports (red arrow)
- Add any event parameters to your event (red border)
Let’s add your Measurement ID first.
How to Configure Your GA Link Click Event Tag
Let’s add your Measurement ID first. Go to Google Analytics and click the gear icon in the bottom left to go to the Admin settings.
Then, click into “Data Streams” from either of these two links below.
You’ll see a list of all data streams in your GA4 property. If you’re like most people, you’ll only have one here (you’ll have multiple if you are tracking both a website and an app in your property). Click on the data stream for your site.

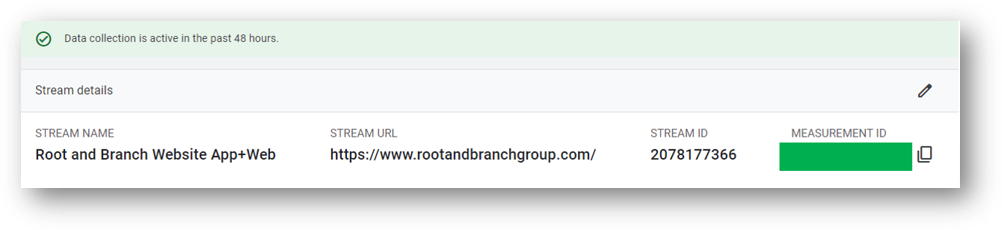
You’ll now see the details of your web data stream. You’ll see the Measurement ID just like below. Click and copy the Measurement ID before heading back to Google Tag Manager.
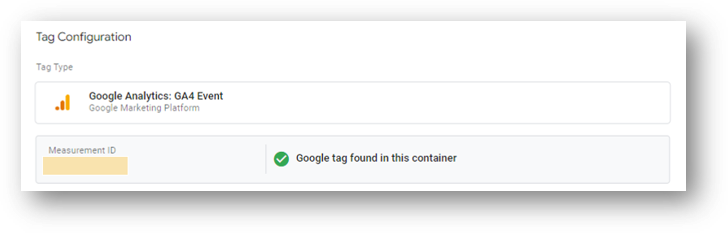
Paste the Measurement ID into the “Measurement ID” field in your GA4 event tag. Once you do, you should see a green check mark and the message that the “Google tag found found in this container.”
Note: If you’re not using Google Tag Manager to install GA4 with the Google Tag you will not see this green check mark.
Now, give your event a name using the “Event Name” field. You can use “internal_link_click” like below, or you can use something else similar that is easy to recognize.
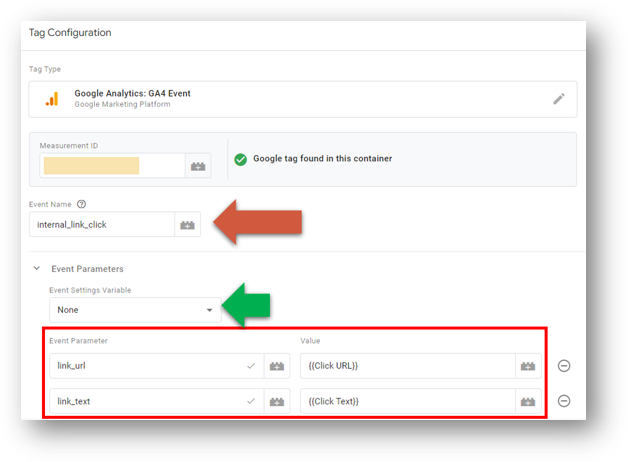
If you’d like additional data to be sent with your internal_link_click event, you can set event parameters. Each event parameter needs a specific parameter and an associated value. The value is the data that you’ll see in your GA4 reports. In this case, we have set link_url and link_text parameters to track the Click URL and the Click Text of all internal link clicks.
Note: Those squiggly brackets (“curly braces”) in the Value fields indicate Variables in Google Tag Manager. A variable changes value based on the specific action that occurs (unlike a constant which always returns the same value). You’ll need to have configured your built in variables in GTM in order to use these. If you haven’t done that yet, just click on “Variables” from the lefthand navigation in the main GTM menu and then click Built-in Variables. Find these two and make sure they are checked “on.”
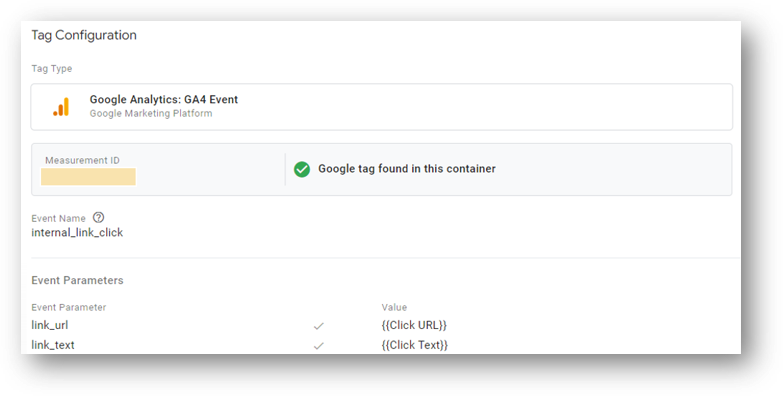
Save your tag. Now it’s time to configure your trigger.
How to Create Your Link Click Trigger
Click into the Trigger Configuration area below your tag. Or, you can navigate to Triggers through the main navigation in GTM. If you do the former, simply click in the Trigger configuration area below your tag. If you do the latter, click on “Triggers” and then click “New.”
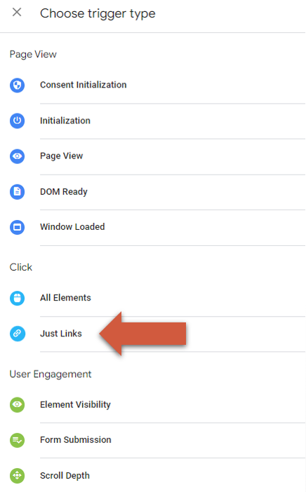
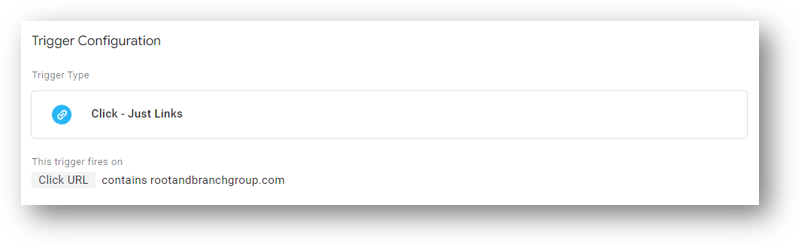
Either way, you’ll see a list of trigger types after you click into the trigger configuration area of your new trigger. Choose “Just links” from the list of options to build a link click trigger.
Like this.
Give your trigger a name. This name is only for organization within GTM. Something like “Trigger – Internal Link Clicks” will work just fine.
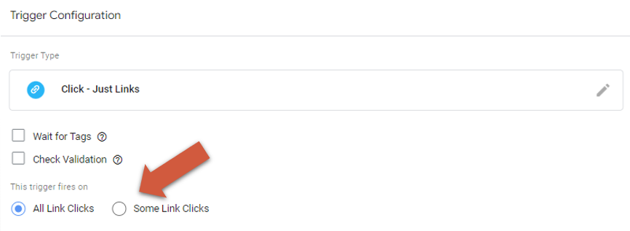
Then choose the radio button so that your trigger fires on “Some Link Clicks”. Like this.
Now, set the specific conditions for which link clicks you’d like your trigger to fire. You want this to only fire on link clicks that remain on your domain. For that, we can use the “Click URL.” So choose that from the list. Like this.
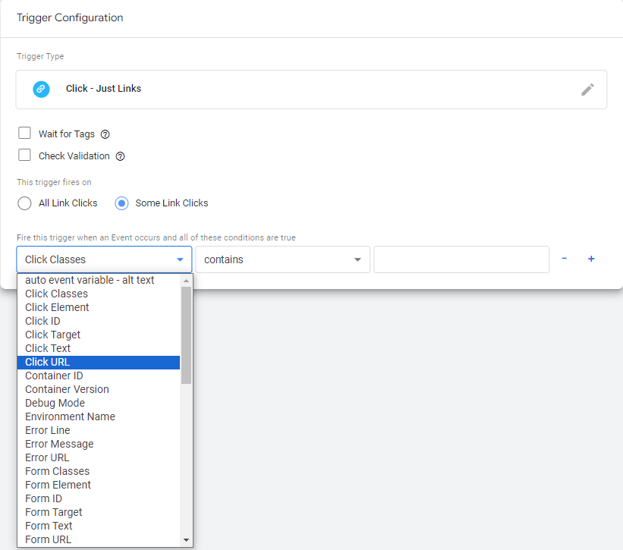
For the match type, you can keep “contains.” Then, enter your domain name in the final field immedaitely to the right of “contains.” This means your trigger will only be active on link clicks from your domain that go to other places on your domain. In other words, all internal link clicks.
Here is the completed trigger.
Pair Your Tag and Trigger and Publish Your Container
After you’ve paired your tag and trigger, you can publish your Google Tag Manager so the changes go live. If you’d like, you can also test your tag and trigger first using GTM’s preview and debug mode. But this is a pretty straightforward setup and all should be working if you’ve followed the steps outlined here.
What Next?
Woo hoo! Thanks for making it all the way to the end! I hope you found this useful. Here are a couple of resources that might be interesting as you continue your GA4 and Google Tag Manager journey.
- Here’s how to understand GA4 event parameters
- And here are 3 simple ways to build a GA4 events report
- Here’s an article showing how you can use GA4 Explorations to build simple custom reports.
Thank you for coming by!


")


Trackbacks & Pingbacks
[…] parameter was passed with the scroll event, the internal link click custom event, the click event (external link click), and the user_engagement […]
[…] Analytics will automatically track external link clicks with the enhanced measurement click event. However, you need to do custom work to track internal link clicks. Check out the previously linked […]
[…] data that adds additional context to a web interaction (an “event”). For example, the GA4 click event will register and record data each time an external link click occurs. But if you want to see […]
[…] you set up a new custom event to track all of your internal link clicks. You do this because the GA4 click event will only track external link […]
Leave a Reply
Want to join the discussion?Feel free to contribute!