
WooCommerce Google Analytics 4 Tracking Tutorial
In this article you’ll learn how to set up Google Analytics Ecommerce tracking for a WooCommerce site.
Google Analytics 4 (GA4) can be a powerful web analytics tool. But you need to know how to use it. It has an event-based data model, but not all (or even most) events and parameters come preloaded when you first install GA4. You have to specify what you want tracked.
And that’s especially true if you want to track Ecommerce events. You can do that with the help of Google Tag Manager, WooCommerce, and a WordPress plugin called GTM4WP.
This article documents the setup process for an ecommerce business (affordablecharms.com). The client wanted to improve SEO for customers looking for Italian charms for their charm bracelets. The site had been running for a while, but with no analytics. The client was leveraging WooCommerce on her WordPress site. Which as you’ll see, can make the Ecommerce tracking simpler.
We set up Google Search Console (GSC) to track her rankings in Google organic traffic. The next step was to measure how the new organic traffic would boost sales.
And to measure Ecommerce data on a WooCommerce site, you can use GA4 and Google Tag Manager.
Enter Google Tag Manager and GA4
We performed a standard GA4/GTM installation to the client’s website, but that was only half the battle. I’ve executed my fair share of GA4 and GTM installs, but I would not recommend manually installing Ecommerce tracking if you don’t have to.
And with WooCommerce you do have a better option. You can use a GTM template and a WordPress plugin called GTM4WP.
Let’s see how.
GTM Container Template and GTM4WP
To capture your site’s monetization, I would recommend uploading a GTM container template directly into your Tag Manager. GTM4WP.com provides such a beautiful solution, complete with instructions on how to implement.
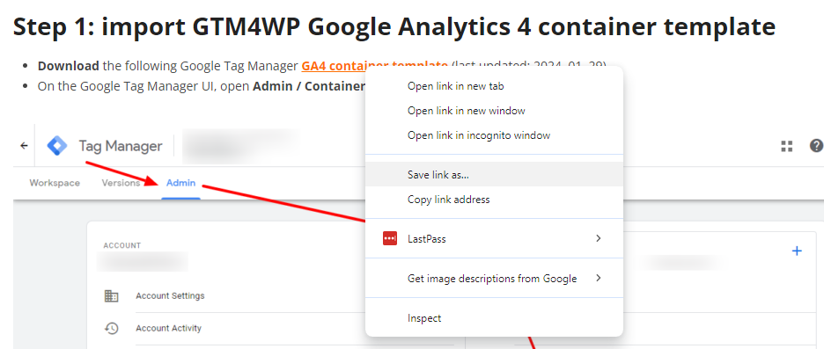
The GTM container template is a JSON file. And it looks like this:
Don’t worry about modifying this file in any way. Simply right-click on the ‘GTM container template’ link above and select ‘Save Link As…’, which should download the JSON file onto your computer.
It will look like this when you right click to save the link..
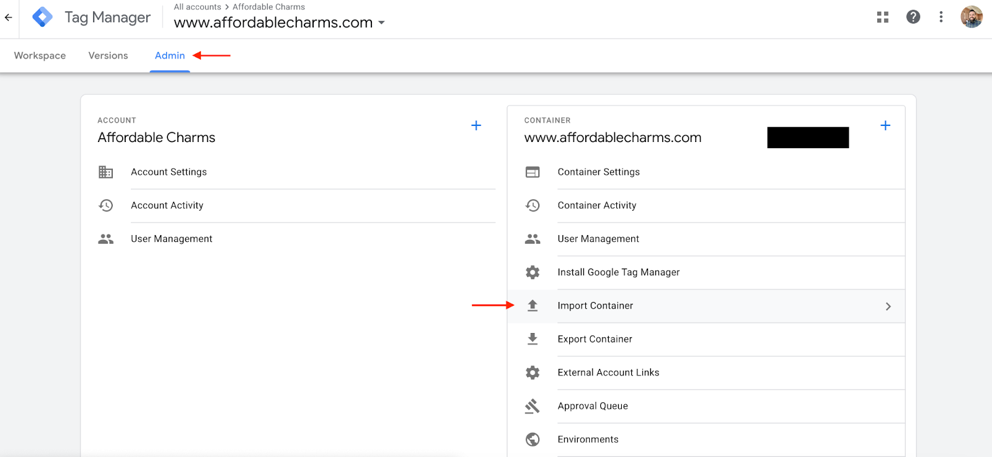
From there, you’ll want to upload this JSON file to your Google Tag Manager account. Here’s how to import that container:
Go to Admin > Container > Import Container:
Like this.
Once you click ‘Import Container,’ you should see this screen:
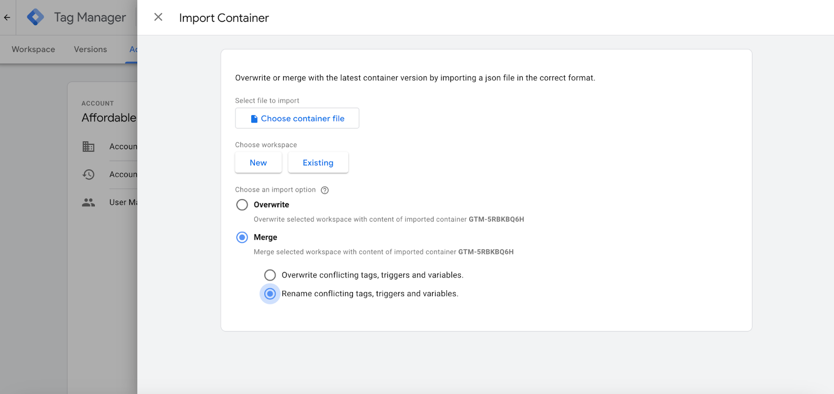
It’s best to implement this new container within a new workspace, but not necessary. If you do use a new workspace you can revert to an older version if you ever need to.
Once on the container import screen, select ‘Merge’ as your import option, and also ‘Rename conflicting tags…” so that the new container doesn’t overwrite any existing configurations. You should only see new tags, triggers and variables, but renaming conflicting tags is a precaution in the unlikely event you have any tags with the same names in your container.
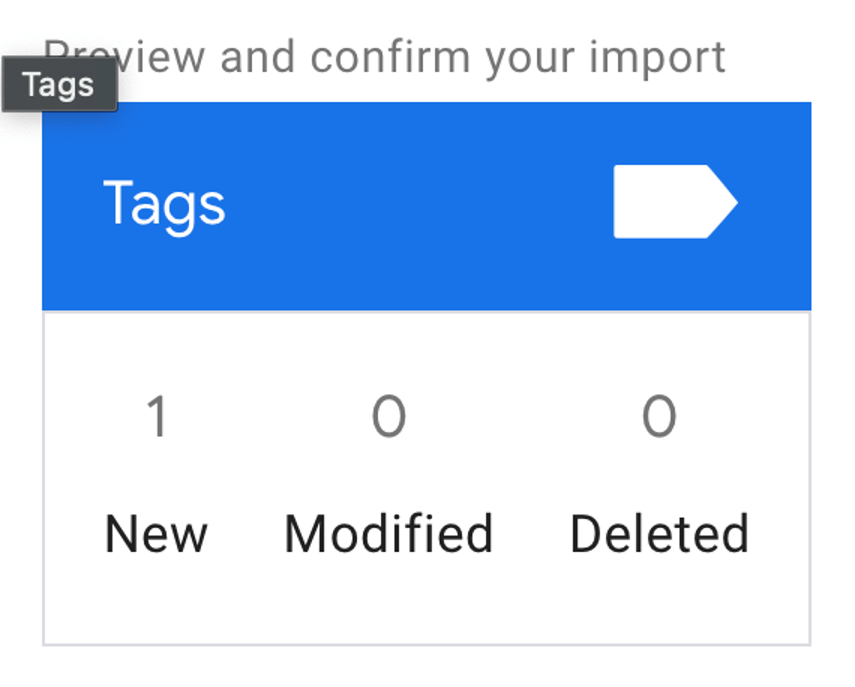
Click ‘Confirm’ and the new container template should upload to your new Google Tag Manager workspace.
The new tag configuration should look like this:
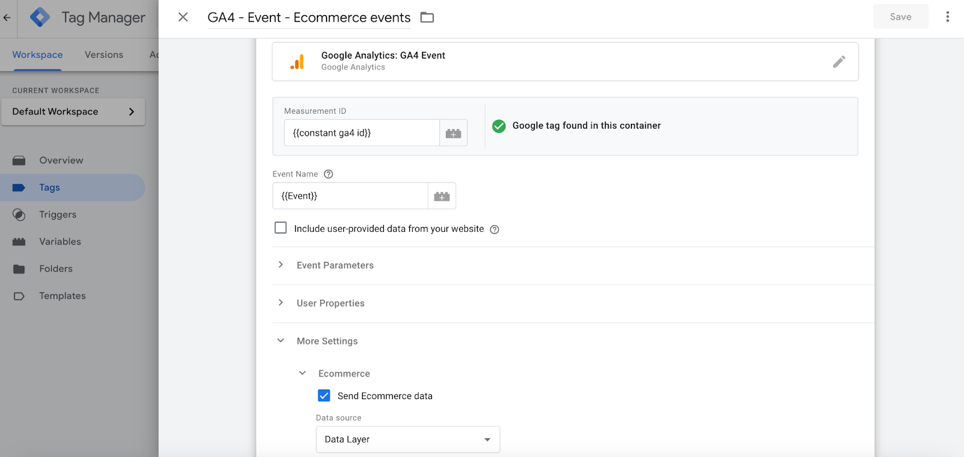
If you haven’t yet set up a {{GA4 ID}} variable for your Measurement ID, you can just enter it manually by navigating to GA4 > Admin > Data streams.
IMPORTANT NOTE: One of the tags that comes included within the container will fire on every page view of your site. This is standard and allows GTM to activate the data layer so that triggers and tags fire properly as users navigate your site. That said, you likely already have a tag like this installed on your GTM, which means the new prepackaged tag you just uploaded is redundant. If that’s the case, simply delete one of those tags to prevent double-firing or otherwise conflicting data.
Publish all of your changes within your GTM workspace, and voilà! You’ll equip your ecommerce website with the proper configuration to track all of the following WooCommerce events:
- view_item
- view_item_list
- select_item
- add_to_cart
- remove_from_cart
- view_cart
- begin_checkout
- add_payment_info
- add_shipping_info
- Purchase
Use GA4 Realtime Report To Test
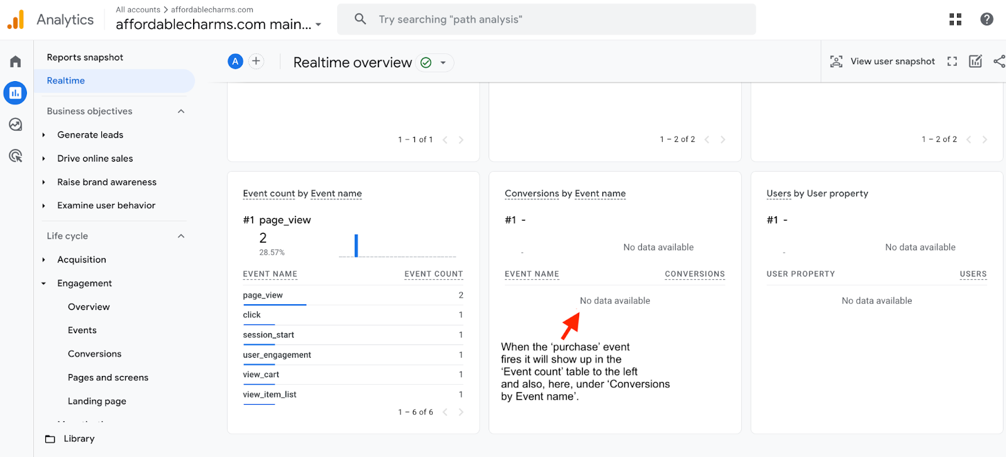
Once the GTM container is published, you can make sure the events are registering in GA4. There are several ways to do this, but I usually like GA4’s real-time view, as I click on the desired events on site.
Out of all these events, arguably the most crucial event/conversion is purchase. It’s harder to test than the others since it fires when an actual transaction is completed. Fortunately, there’s a good way to do this.
Test WooCommerce Transactions Without Spending Money
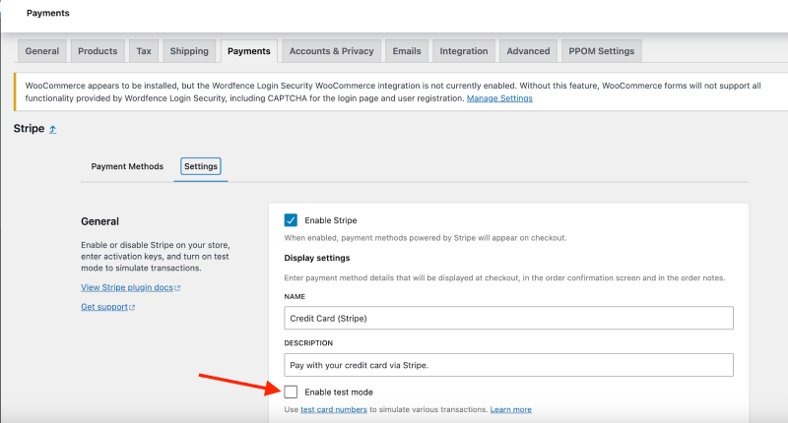
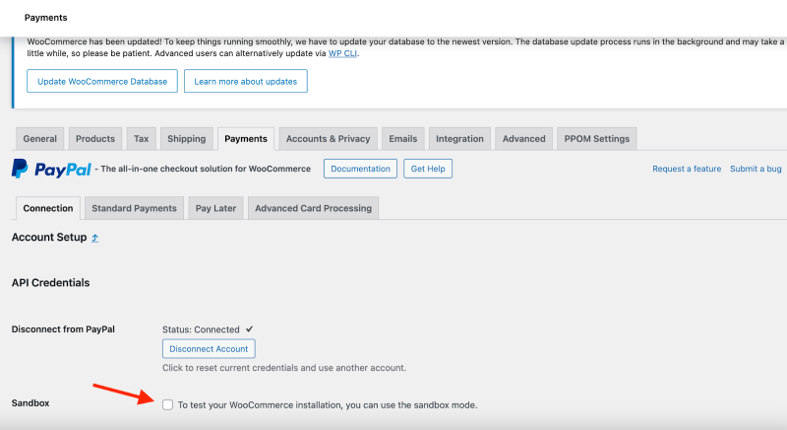
WooCommerce has you covered for testing Ecommerce tracking for purchases. If you have API test keys enabled on the back end of your WooCommerce plugin in WordPress, you can ‘enable test mode’ to run mock transactions through the credit card payment window, without incurring real charges.
Just hit this check box within the “Settings” of the “Payments” section of WooCommerce.
For other payment methods, like PayPal, you should have the option to put Woocommerce in ‘sandbox mode’.
And if, for whatever reason, those options are not available, you can run a real transaction and then just make sure to quickly refund yourself.

Whichever transaction method you choose, just don’t forget to check GA4’s real-time view and make sure the purchase conversion shows up in that center column, under ‘Conversions by Event Name’.
GA4’s ‘Custom Definitions’ Provide In-depth Data
Once you’ve tested your newly minted WooCommerce events in GA4, you’re good to go. When customers now visit your site, browse, select and purchase items, you’ll be able to track all of this activity and attribute what behaviors are leading to which purchases.
Depending on the complexity of your website, you may want to set up further tracking.
Custom events and custom definitions add more data to your GA4 events. Let’s look at a non-Ecommerce example. The session_start event will automatically fire an event every time a new session begins on your site. You can’t turn it off, even if you wanted to. And you can use it to see how many visits your website gets.
This event can tell you even more with two important event parameters that are created with the event: ga_session_count and ga_session_id. Session count tells you how many visits a specific user has had on your site. And session id lets you analyze all that took place during the visit.
In order for you to see those event parameters in your standard reports, you’ll have to set up custom dimensions within GA4 admin section. Here’s what you’ll see if you do that for ga_session_id.
Note: Don’t do this if you have more 500 visits a day on your site as you’ll run into cardinality problems.
ga_session_id
Among my favorite GA4 ‘Custom Definitions’ is the ga_session_id parameter, which assigns all relevant events to a certain user session. For sessions that led to a conversion, you can now track back all the events within this specific session that led the site user to convert.
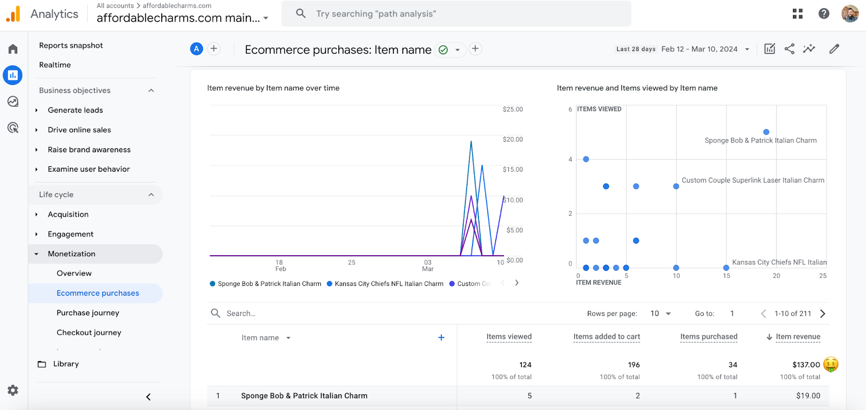
In the above example, I’m sorting by purchases. I want to see all user sessions that led to a purchase. I can then produce a supplemental report that’s sorted only by these successful ga_session_id’s to see what else occurred within these specific sessions. For instance, I can see exactly what they added to their cart within a specific session:
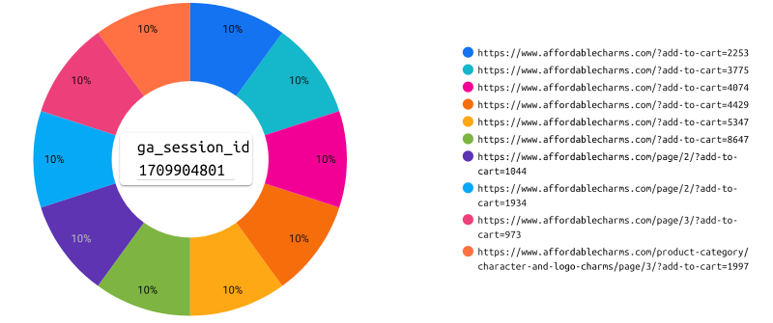
The four-digit number at the tail end of each /?add-to-cart= URL corresponds to a specific product within the client’s inventory.
IMPORTANT REMINDER: Delving into data points at this granular of a level can lead to cardinality issues. If any specific metric carries more than 500 unique values within a given day, it may exceed row limits on GA4 reports. If you’re monitoring a higher traffic site that on average earns far more than 500 unique sessions per day, you may want to consider another method of tabulating specific user behavior.
T
The search_term event parameter is another way to learn more about your Ecommerce site. And this one doesn’t come with the same cardinality risks.
search_term
If your website features a search bar, you’ll want to call out the search_term parameter for whenever a user enters a term into this field. This is one way you’ll be able to gauge site visitor interest in your products by keying into what they search for most, on site. Over time, you can pull a view_search_results event report in GA4 and couple that with the secondary dimension, search_term:
Further Reading
To bring this article full-circle, you may remember that we mentioned how we first set up Google Search Console (GSC) on the client’s site. That helps track SEO performance on Google organic search.
You can also see what Google Search terms brought visitors to your website by linking Search Console with GA4.
You should do this especially if organic traffic is your main inbound channel. This data helps close the loop between what Search behavior and site engagement contributes to conversions. You can use it to incorporate SEO web copy and other content on your site that not only shows up prominently in Search, but has proven to convert site visitors into customers.
This article was written by Mike Del Rosso.

")


Leave a Reply
Want to join the discussion?Feel free to contribute!