
Google Tag Manager Container Code Basics 2024
Updated: 12/25/24 The container code is the foundation of Google Tag Manager. And although most of your work will be inside the container as you create tags, triggers, and triggers, it’s also important to know how to deal with the container code itself.
Here is what you’ll learn in this article.
- Where to find the Google Tag Manager container code
- Why are there two container code snippets?
- How to create a new container code within the same account
- How to export (and import) a container
- User access within your container
Let’s start with finding the container code within Google Tag Manager.
Where Do I Find the Google Tag Manager Container Code?
First, head on over to tagmanager.google.com and log in.
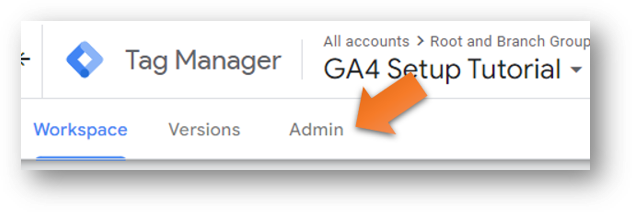
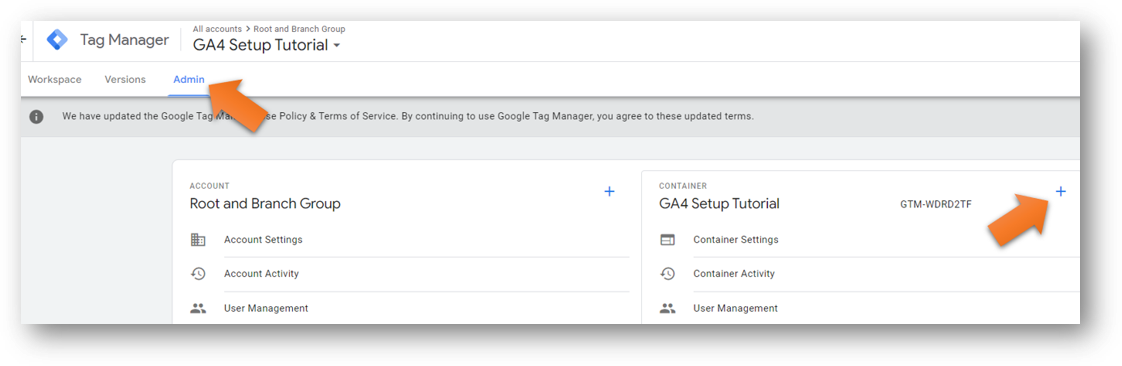
After you find your account, click into the ‘Admin’ tab from the top menu.
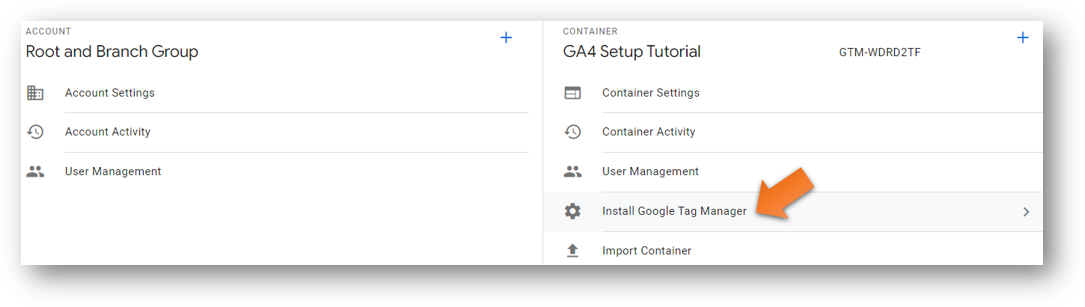
Now, click on ‘Install Google Tag Manager’ from the container settings on the right side of the screen.
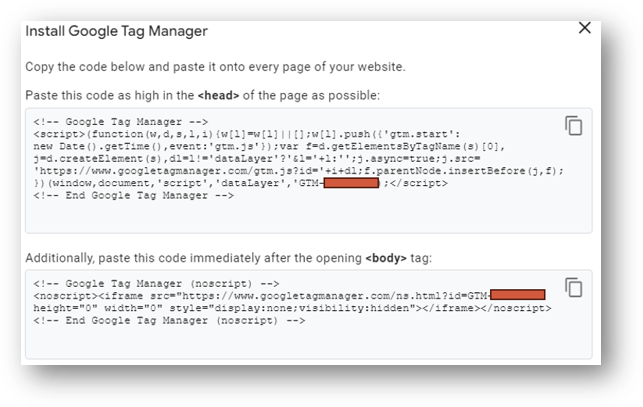
Boom. You found it. You’ll see two code snippets. When they are both installed on your site, your container code is successfully running. The 7 digit number that follows “GTM-” (in the red boxes below) is your container code ID.
Why are There Two Container Code Snippets?
The first is a javascript code snippet that gets deployed in the <head> of your website. This is the code that executes Google Tag Manager the majority of the time.
The second code snippet is called the noscript tag. This gets placed in the <body> or <footer> and will only come into play in the rare situations where javascript is not running on a browser.
How to Create Multiple Containers in the Same Account?
Sometimes you’ll want to have multiple container codes in a single Google Tag Manager account.
No kidding.
Why Would I Need Multiple Container Codes?
One common example is if you have multiple domains for your business or if you have multiple subdomains and want to keep your tags organized for the various subdomains. In Google Analytics 4, cross subdomain tracking is applied automatically, meaning data from blog.yourwebsite.com and yourwebsite.com will all be collected together if the same GA4 property is running on both.
Some people like this. Some don’t.
If you’re in the second group, you won’t want the same GA4 Measurement ID deployed on your subdomain blog and on your primary domain. Having a different container code for your primary domain and your subdomain can help you keep this all straight.
Most other reasons for multiple container codes are also related to organization. So, here’s how to create multiple containers.
Option 1: Create from the Admin Section
Head on back over to ‘Admin’.
From the ‘Admin’ section, click on the little blue plus sign to the right of your container settings as you can see at the far right arrow below.
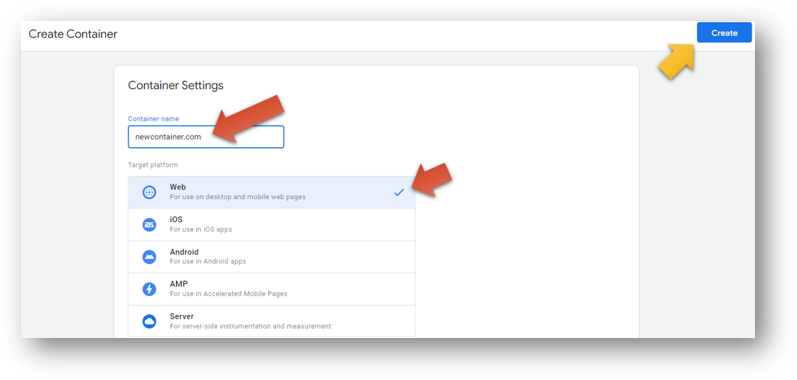
Now, you can create a new container code. Give your container a name and choose what kind of platform it will be on. In most cases, the answer is ‘Web’ but obviously pick something different if it’s for an app.
Then, hit the blue ‘Create’ button.
As soon as you do, you’ll be redirected to see your jazzy new container code snippets.
There’s another way you can create a new container code.
Option 2: Create from the Admin Section
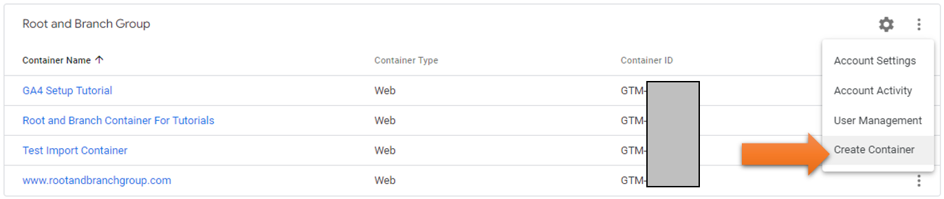
You can also create a new container from https://tagmanager.google.com/#/home. When you see your account in the list of GTM accounts, click the 3-dot icon in the upper right of the image below. You will see some quick options for easy access.
One of them is “Create Container.” Click that and you’re off to the races once again.
Whichever option you follow, you’ll now have multiple container codes within your single Google Tag Manager account. It’s similar to how you can have multiple Google Analytics 4 properties within a single Google Analytics account.
You can take your GTM container management to the next level by knowing how to export an existing container and import it to a new account.
Exporting and Importing a GTM Container
Your tags, triggers, and variables exist within your GTM container. And that can take a long time to create properly. Knowing how to export and import can provide some valuable benefits. There are two primary ones:
- Backup and recovery: You can create a backup of your container so you have a fall back plan in case you need to restore your container to a prior version
- Template creation and transferability: If you work with multiple clients in similar industries you may need similar tags and triggers. You can create efficiencies by exporting your containers and importing them to new accounts.
Here’s how you can do it.
How to Export a GTM Container
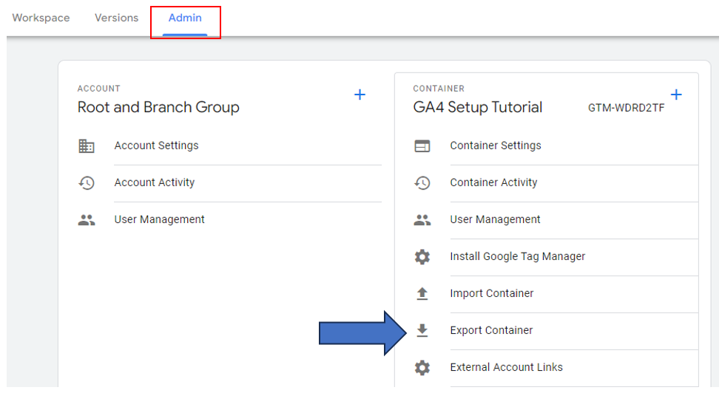
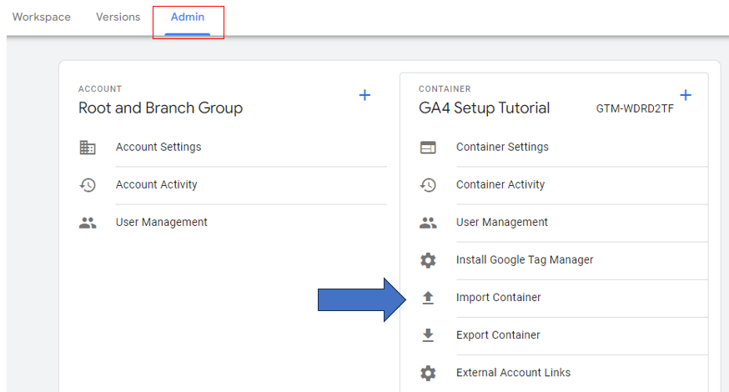
Go to “Admin” and then click “Export Container” within your Container settings.
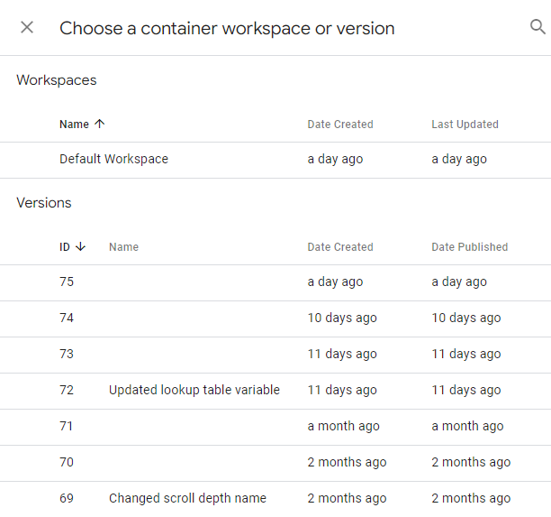
Then, choose your current workspace or a previously published version that you’d like to export.
Your container will be exported as a JSON text file.
How to Import a GTM Container
After you’ve exported the GTM container, go to the second Tag Manager account where you want to import the container. Go to “Admin” and then select “Import Container” in the Container settings.
Click “Choose container file” to select the JSON text file you exported. You’ll need to choose whether to import the container into a “New” or an “Existing” workspace. And you’ll need to either Overwrite the existing workspace with the container settings you’re importing or to merge the new container with your existing one.
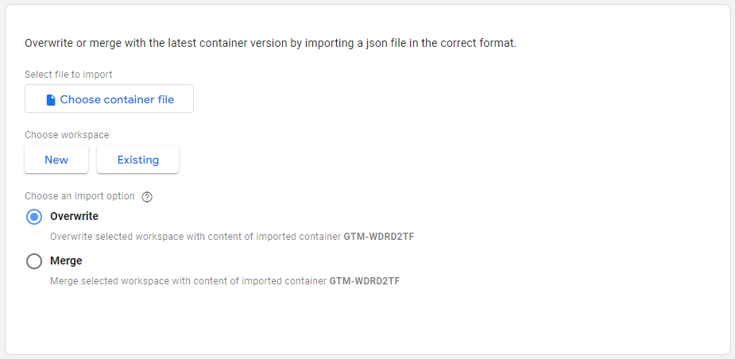
The Overwrite option will remove any existing tags, triggers, and variables from your container and replace them completely with the imported container. This is a great option if you’re starting from scratch.
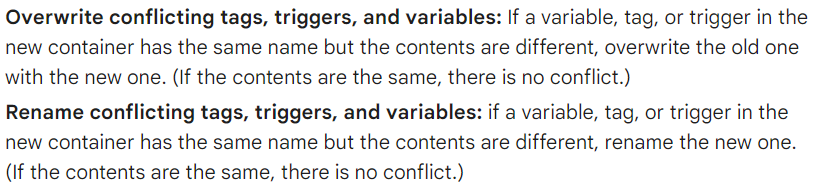
If you choose to Merge, you’ll be combining the newly imported container with your existing container. You’ll need to choose whether to “overwrite” or “rename” conflicting variables, triggers and tags. Here’s what that option means according to this Google support article.
User Access Within Your Container
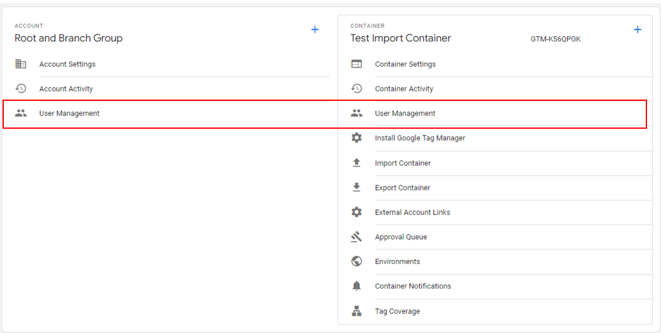
You can also manage your users within your container. As you can see below, you can manage users at the Account level (left side) or at the Container level (right side). If you have multiple containers for various websites, it’s helpful to have container level management so you can make sure the right people have access to the proper resources.
To add someone new to your container, click on “User Management” at the Container level.
Then, click the blue plus sign that you can see below at the far right.

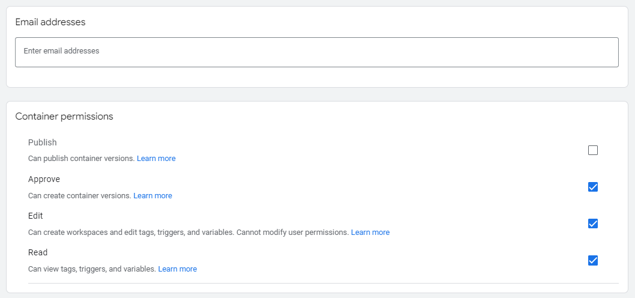
Enter the email address of the person you’re adding to the container and set their permission level. They will need “Publish” level if you want them to be able to make changes in the container and push those changes live. If you only want them to be able to make changes and not make anything go live, “Edit” level access is fine.
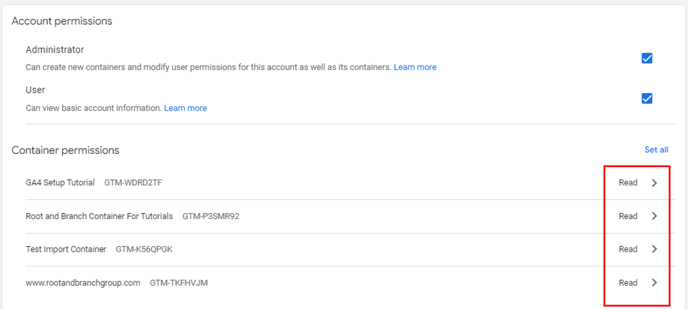
If you set permissions at the account level, you can control the container permissions for all containers in a single place. Here’s an example of a user who has admin access at the account level and can add new users. But only has “Read” access for the multiple containers, meaning this person can’t make any changes to those containers.
More Google Tag Manager Resources
There’s a lot to learn with Google Tag Manager. If you’ve found this helpful, you might also like these three articles:
- A comparison of Google Analytics vs. Google Tag Manager
- How tags and triggers in GTM work
- How to combine multiple triggers in a GTM trigger group
About Root & Branch
You can learn more about Root & Branch here.

Trackbacks & Pingbacks
[…] trigger is now configured. You can give it a name to help keep your GTM container organized. I’ve called this one “Link Click Trigger – Sports Betting” as […]
Leave a Reply
Want to join the discussion?Feel free to contribute!