
Google Tag Manager Basics: Master Tags and Triggers
[Updated 1/25/25] Learning Google Tag Manager basics begins with mastering tags and triggers. So let’s learn how GTM tags and triggers work and then walk through the process of setting up a GA4 event tag in GTM.
Once we set up our trigger and tag in GTM, we’ll send event data into Google Analytics based on the specific event parameters we specify.
Table of Contents
- What is a tag
- What is a trigger
- How do tags and triggers work together
- Ingredients before we begin
- Configure your GTM tag and trigger
What is a Tag in Google Tag Manager?
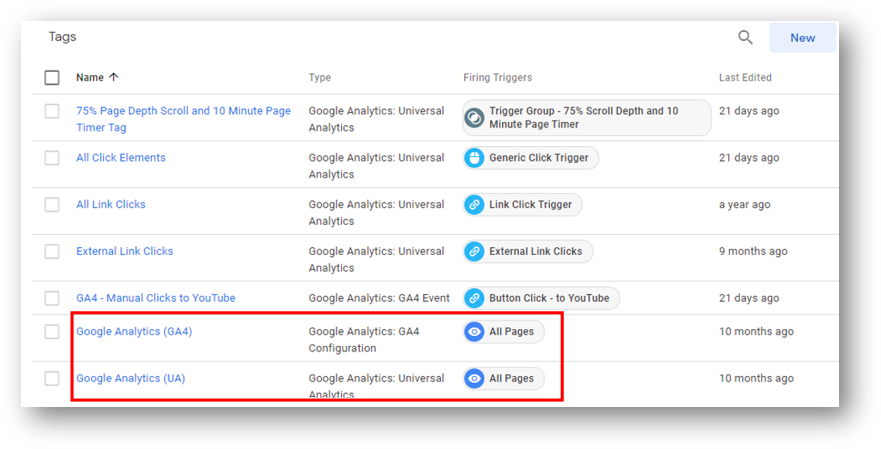
A tag is piece of code that can send data to a system such as Google Analytics. A tag could be something like the code for a Facebook tracking pixel, or the code snippet for Google Analytics. The screenshot below shows the two Google Analytics tags on the Root and Branch site (the GA4 property type and the UA property type) within the associated Google Tag Manager account.
In addition to tags like this, we can create other tags to track a specific action on our website. You can see these other other types of tags in the first five tags below.
These actions are called “events.” Google Analytics 4 has an “event-based data model” which means all user interactions are tracked as events. We’re going to walk through an example of creating a tag and associated trigger for event tracking in the walkthrough below.

Explain These “Events” A Bit More
An “event” could be something like scroll depth tracking, or video plays, or page timer tracking, or link click tracking. In this case, the event we’re going to be tracking is a specific click from a specific page (the Root and Branch homepage) to a specific destination (this Medium article on the surprising data of US sports betting).
What is a Trigger in Google Tag Manager?
A trigger “listens” for certain actions (the aforementioned “events”) to take place. Those actions could be clicks, form submissions, pageviews, scroll activity, or video plays. For a tag like a Facebook tracking pixel, the trigger will be a pageview of any page of the website in question. That page loading (the trigger) will tell the Facebook pixel (the tag) to get to business and start collecting data. For a more specific action that we want to track like our example of tracking clicks from the homepage of this site to the YouTube channel, we’ll want to create more specific rules for our trigger.

On its own, a trigger can only listen. It needs help in order for data to be created and shared with an associated platform like Google Analytics.
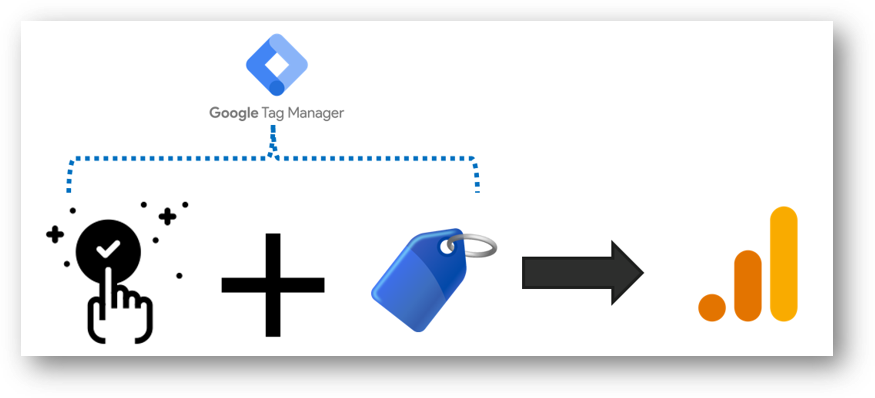
How Do Tags and Triggers Work Together?
Within the Google Tag Manager platform, we will define our trigger and our tag. The trigger is specific action that we are listening for. The tag holds the data that we want created. When a tag is paired with a corresponding trigger, data will be sent through to Google Analytics as the trigger fires.
It looks like the diagram below.
Let’s see how it works!
Before We Begin: Here’s What We’ll Need
We’ll be working with Google Tag Manager and linked Google Analytics (GA4) property.
Google Analytics 4
You’ll need a GA4 data stream collecting data on your website.

Google Tag Manager
GTM is where we’ll actually be doing the work to create our trigger and our tag. If you are not currently using Google Tag Manager, you can check out this guide to set up Tag Manager on your WordPress site. And if you’re confused about the difference between the two platforms check out this comparison between Google Analytics vs. Tag Manager.

Configure Your Tag and Trigger
Let’s start by creating our trigger.
Let’s Create Our Trigger
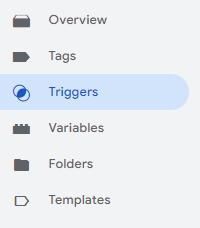
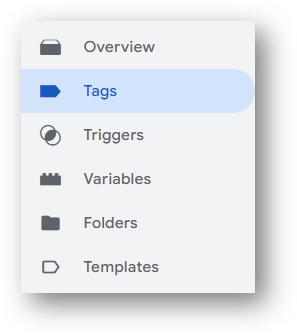
Click “Triggers” from GTM.
Then, click “New” to make a new trigger.

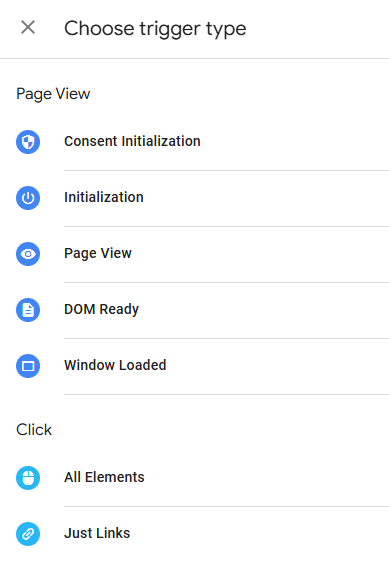
Click into the area that says “Choose a trigger type to begin setup” within the configuration window that appears.
You’ll now to select a specific kind of trigger from the list of available options. Click “Just links” from the list (at bottom below).
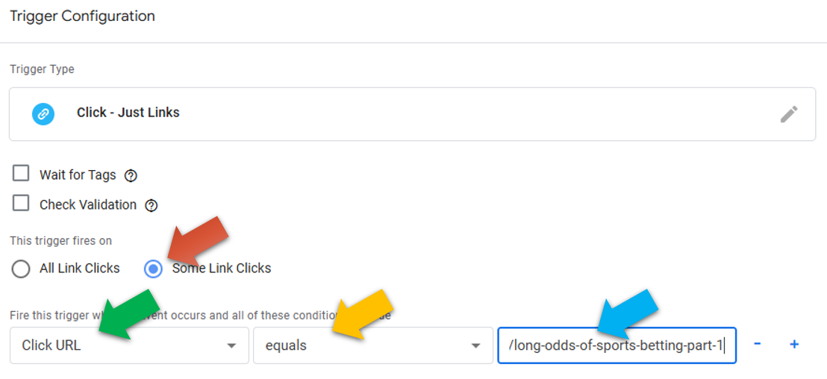
We can set this trigger to fire on ALL link clicks or just SOME link clicks. We’re going to go with the latter, so we only track clicks that go to the aforementioned sports betting article. Here are the four things we’ll configure:
- As we already said, we’ll change the trigger from firing on all link clicks to just some link clicks (red arrow)
- The firing condition of the trigger will be based on the Click URL (green arrow). If you don’t see it available in the drop-down, just select “Choose built-in variable” in the drop and then select “Click URL” from the list.
- Change the firing condition of the Click URL to “equals” (yellow)
- Paste in the URL of the link that you want to track (blue arrow)
a
Your trigger is now configured. You can give it a name to help keep your GTM container organized. I’ve called this one “Link Click Trigger – Sports Betting” as you can see in the upper left below. This doesn’t affect your data at all; it’s only for your organization. Then, click “Save.”
Let’s Create Our New Tag
Now, create your new tag. Click “Tags.”
And create a new tag.
Click into the Tag configuration area where you see “Choose a tag type to begin setup.”
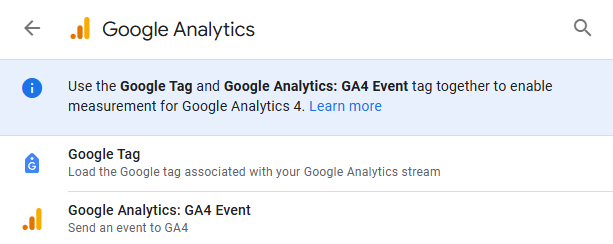
Then, choose “Google Analytics” which you can see at the top of the list below.
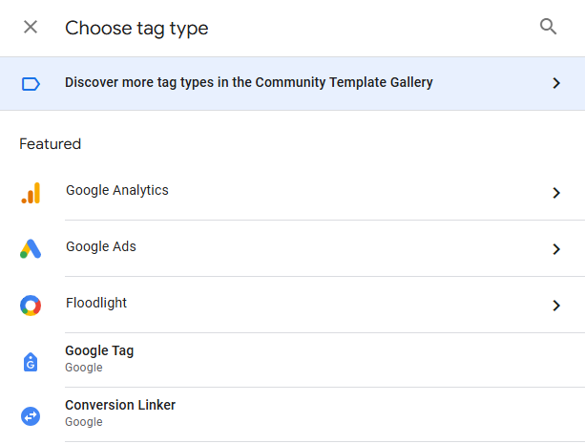
The next thing to do is select the type of tag we’re going to be creating. This tag is for event tracking for our associated Google Analytics (GA4) property, so we select “Google Analytics: GA4 Event” as our tag type. You only have two options here.
Here’s how to configure that tag.
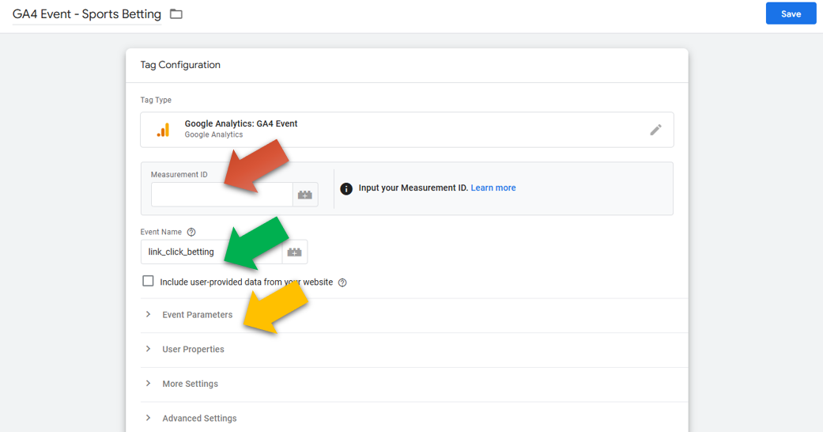
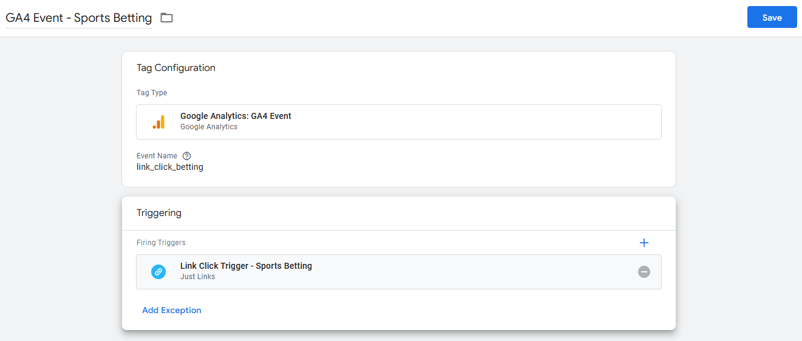
- Give your tag a name in the upper left. Like the name of the trigger, this is only for your organizational purposes in GTM. You can see I’ve called this “GA4 Event – Sports Betting.”
- Plug in the measurement ID from your GA4 property where you will be tracking the event (red arrow). If you need a reminder on where to find it or haven’t yet set it up, check out this GA4 and Google tag article.
- Type in an “event name” (green arrow). This is the name you’ll see in your GA4 data every time your event fires. We’ve called ours link_click_betting.
- An optional step is to set up event parameters (yellow arrow). Parameters are additional pieces of data that add more context to your event when it fires. You can always come back to this optional step in the future, or you can bookmark this event parameters explanation for future reading.
2
We’ll give ours a descriptive name: GA4 Event – YT Subscribe.
After we name it, click Save.
Pro tip: Use a snake_case (lowercase and underscores for spaces) naming convention for your event names in order to match with the other event names that GA4 will track automatically.
Configure The GA4 Event Tag
In the days of Universal Analytics, we created events by identifying specific event parameters. We identified a specific name for up to 4 parameters: category, action, label, and value. Only the first two were required with label and value being optional. Each parameter could be hard coded (manually typed in) or set up as a variable.
Event parameters in GA4 look much different.
Our Tag and Trigger Together
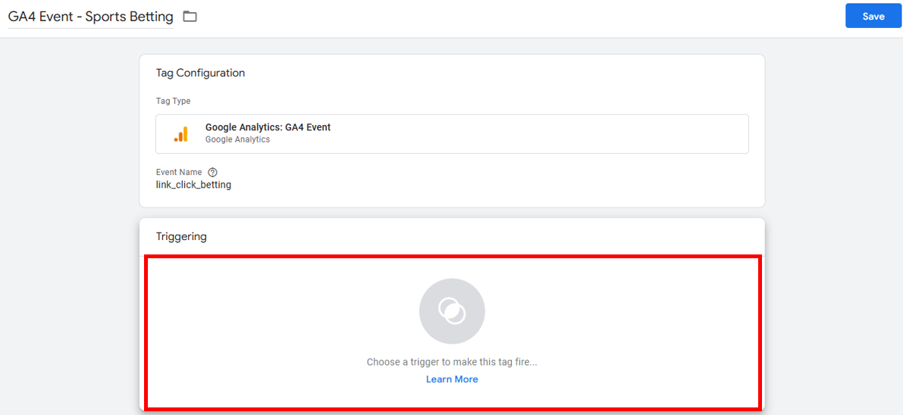
The last step is to select a firing trigger for the brand new tag.
The good news is that you’ve already done this if you’ve been following along. Click into the triggering area (red box below).
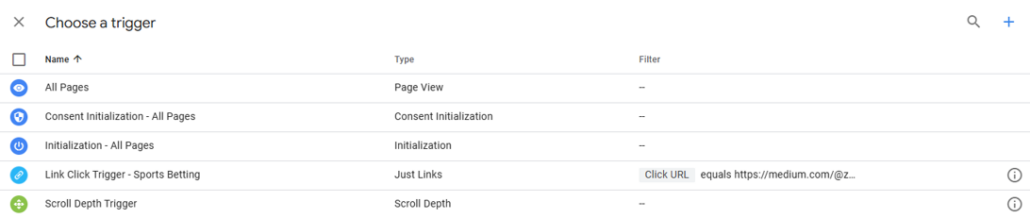
You’ll see a list of all available triggers. See ours at the second from the bottom? Just find it and click it.
Now you have a GA4 event tag and it’s nicely paired with your trigger. You are getting Google Tag Manager basics nailed! Go ahead and click “Save” to make it official.
Last Steps
Congratulations! You (hopefully!) now know a bit more about GTM than you did before. Tag Manager can be confusing and overwhelming, but if you can grasp the concept of tags and triggers you can understand the primary way in which the platform works. Bravo! Google doesn’t seem to do us many favors either by having products platforms with very similar names. For example, the new Google tag is located within Google Tag Manager and is used set up Google Analytics.
From here, you’ll just need to publish your container to make your new tag and trigger live on your website. Of course, that might be a little too soon if you haven’t yet thought through what data will truly be most helpful for your digital analytics set up.
If you don’t know what that really means, I’d recommend reading this short overview of data collection vs. digital analytics.
Either way, you should know have a deeper understanding of how to use GTM. It’s a very flexible too. For example, you can also use Tag Manager to deploy other code-based tools on your website. You can find one example of that in this Microsoft Clarity set up guide.
Thanks for reading and have fun with those tags and triggers!


Trackbacks & Pingbacks
[…] link click tracking, and more. Google Tag Manager is a powerful tool and you should probably know how tags and triggers work, but it’s not for […]
[…] tags and triggers in GTM […]
[…] Google Tag Manager, navigate to the variables section and create new variables under “User Defined […]
[…] it out, along with the codes I’ve used to set up Google Tag Manager and the Facebook domain […]
[…] methods exist to install the Clarity tracking script, but we will focus on using Google Tag Manager […]
[…] how to install GTM in 4 minutes. If you’re not yet comfortable with GTM, this guide to understanding tags and triggers may be worth a […]
[…] will help get the job done quickly. I’d also recommend reading about how tags and triggersGoogle Tag Manager Basics: Master Tags and Triggers […]
Leave a Reply
Want to join the discussion?Feel free to contribute!