
How to speed up WordPress using Cloudflare and Kadence Blocks
Your site is too slow. It’s one of the most common issues WordPress users run into.
While a WordPress site can achieve excellent load times, it probably isn’t going to do so out of the box. That’s why there are tons of plugins and tools out there that promise to improve your site’s performance.
I have used some of them in the past with limited success. I stumbled upon a setup, however, that is very simple, free, and gave me phenomenal results.
If you’re building a WordPress site or trying to speed up one you already have, keep reading to find out the tools I used and how you can implement the same setup to speed up WordPress.
If you’d like to jump to a particular section, here’s what we’ll be covering:
How important is website speed?
Why your web hosting provider matters
How important is website speed?
Before diving in, it’s worth remembering why website speed matters.
At the most basic level, the answer is obvious. Slow-loading sites are annoying. And if your site is annoying for your visitors, they aren’t going to stick around.
Want some numbers? The majority of internet users expect a page to load within 3 seconds. After that, you’ll start rapidly losing visitors. Half will be gone if the page takes 6 seconds to load.
And slow load times aren’t just annoying for your users. They annoy Google’s algorithm, too. How long it takes for your pages to load is a ranking factor.
These things can matter a lot, especially if you are running a high-volume site. Have a look at these case studies of site speed to see what I mean. Of course, it isn’t all that matters. You want to make sure you optimize your content (with tools like SEO Surfer) and pay attention to SEO strategy.
But if you want to keep both visitors and Google happy, you’ll want your site to load as quickly as possible.
How can you make it happen?
Why your web hosting provider matters
One other thing worth noting at the outset. Your web host provider (and the package you select) is going to have a significant impact on your website speed. Plans differ in terms of things like processing power, memory speed, and bandwidth.
I don’t have the space the get into detail about hosting providers here. It’s helpful for you to know what I’m using, however, since it’s a key part of the overall setup. My site is hosted on SiteGround and I’ve been super happy with the experience. I have seen better load times and better tools than I had with Bluehost.
If you are using SiteGround as well, I’m including a note below about the settings you’ll want to use.

How to speed up WordPress
Okay, let’s dive into the details.
I’ll begin with a brief overview and then walk you through each component of the setup in more depth.
There are two key pieces that, working together, have allowed me to achieve super-low load times:
Cloudflare: Many people are familiar with Cloudflare’s CDN service. (CDN stands for “content delivery network.” It enables faster loading times by storing your website data in distributed data centers and then loading from the one nearest your site visitor.)
Cloudflare offers much more, however. For this setup, I took advantage of their caching to serve website content from their servers instead of from my host’s servers.
Kadence Blocks: This WordPress plugin allows you to greatly expand the functionality of the Gutenberg editor in site building. In some ways, it resembles a builder like Elementor or Divi.
Unlike those tools, however, Kadence Blocks work within the native Gutenberg editor. The result is that it is much lighter weight and you’ll end up with less code bloat.
How much less? I’ll unpack an example below.
First, though, you’re probably wondering, how fast are we talking? Let’s see some numbers, shall we?
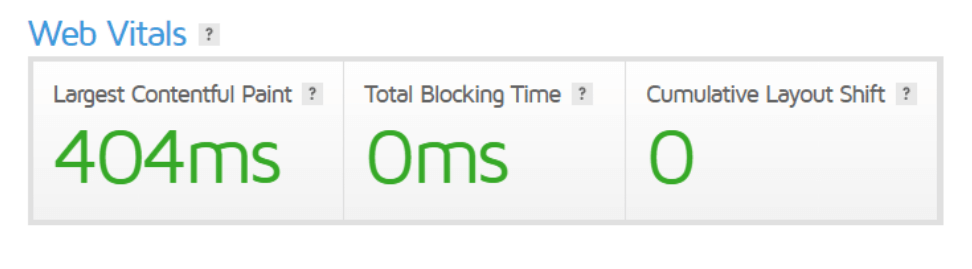
Zack and I have a website we’re working on as a sort of side project. Here are the GTMetrix scores:
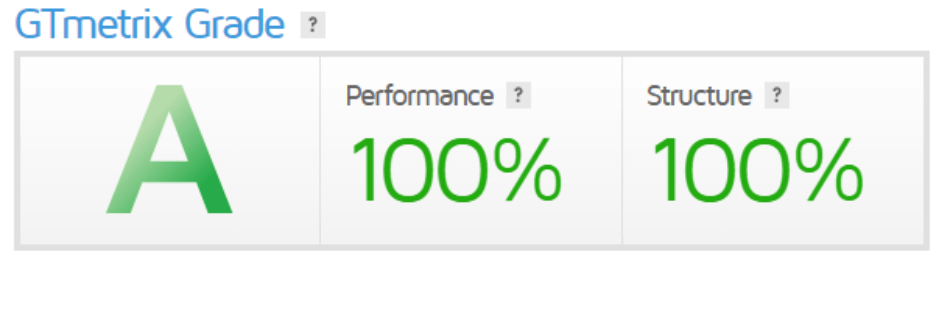
Not too shabby. I also checked the numbers using PageSpeed Insights, which gives separate scores for desktop and mobile. The mobile performance score is 94. I have built a few sites using various setups and tools to optimize speed. I’ve never seen anything close to that high of a score for mobile. (100 is the best possible score here.)
(Note about scores: I usually check a site several times on each tool to get a sense of the average numbers. They will be slightly different every time you check, since there are a lot of variables—like volume of network traffic—in constant flux.)
So how can you achieve similar results? Keep reading to find out.
Kadence Blocks
Kadence Blocks is a free WordPress plugin. Head to “add plugins” and search for “Gutenberg blocks by Kadence.”
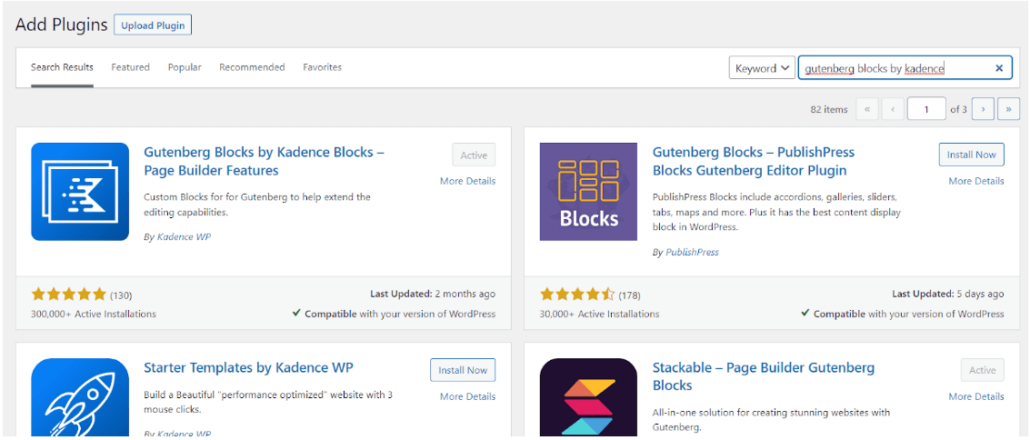
You can also see in the image above that Kadence has a set of started templates, too. Feel free to grab that as a great place to start if you’re building a new site.
Once Kadence Blocks is installed, you will find a new selection of blocks within the Gutenberg editor when you are creating a new page or editing an existing one.
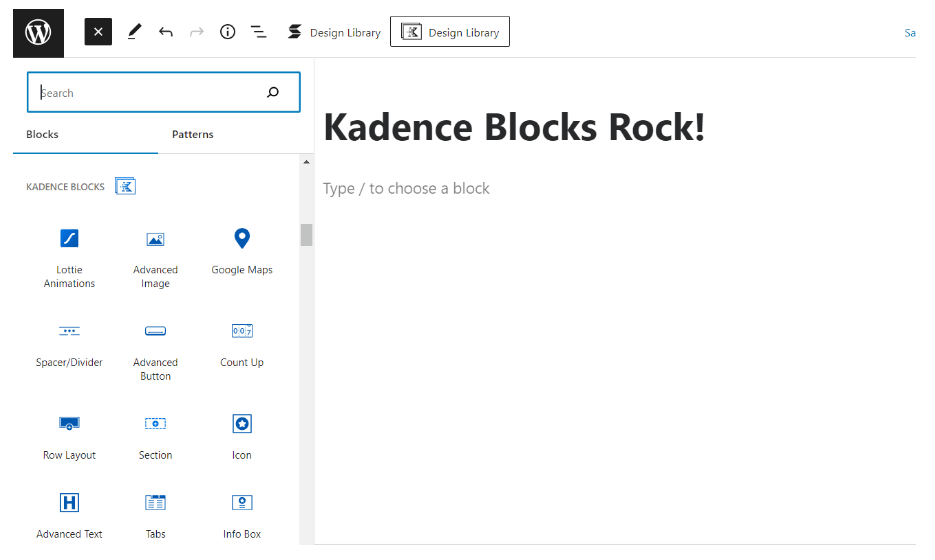
This isn’t a complete tutorial on Kadence Blocks, so I won’t go into all the details here. But if you’re familiar with building a page with the Gutenberg editor, you’ll find them easy to use. Even if you’re not used to using Gutenberg, the controls are intuitive and you’ll get the hang of things quickly with a little trial and error.
Kadence Blocks includes elements like tabbed content, table of contents, advanced gallery, testimonials, and accordions — 15 blocks in all. Each one is fully customizable and looks great.
One of the other great features of Kadence Blocks is the Design Library, which you can access at the top of the page in the WordPress editor. It gives you prebuilt sections using Kadence Blocks that you can drop right onto your page to save time and get professional-looking results.
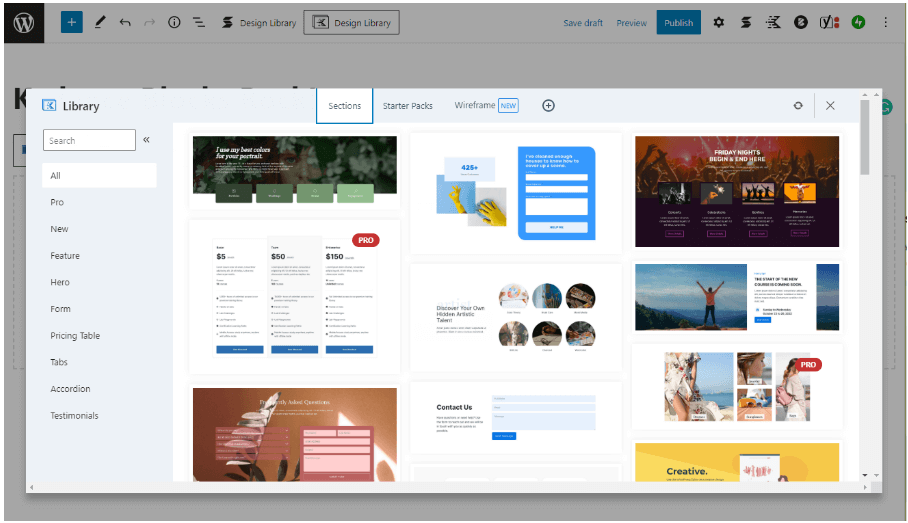
You may have noticed the little red “PRO” graphic next to two of the sections above. There is a pro version of Kadence Blocks (starting at $69 for a year) that gives you access to additional features and templates. But the free version is robust and you can definitely build a beautiful site without an upgrade.
Lighter pages with Kadence Blocks
I said above that the advance of using Kadence Blocks is the ability to build great-looking pages without the bloat that comes long with a drag-and-drop builder like Elementor.
Here’s the proof. I created a simple page that included a hero section with a heading, button, and image; a brief icon list; a few paragraphs of text; and then a section of tabbed content.
I made two versions of this page that were identical except for one thing: one was build using Elementor and the other was created with Kadence Blocks. When I published the pages and ran them through GTmetrix, here’s how the page sizes compared:
Built with Elementor: 709 KB
Built with Kadence Blocks: 209 KB
The page created using Elementor was more than three times the size! By far the largest difference was in the amount of JavaScript code: 356 KB vs. 90.3 KB.
Moreover, the Elementor page needed 44 requests to execute all of its JS and CSS code. The Kadence page needed just 15.
These glaringly different metrics translate into a much faster page experience with Kadence Blocks.
Curious to try Kadence Blocks for yourself? Head to their site.
Cloudflare
The other key part of my setup is Cloudflare.
If you’re not familiar with Cloudflare, it is a company that offers a suite of tools for making your web traffic more efficient and more secure. You can route all traffic to your domain through Cloudflare, which enables you to tweak things in various ways to improve your site’s performance, security, and reliability.
It has so many great features. I use it, for instance, for purchasing and managing my domains. You can also set up custom email addresses for any domain you own and route them wherever you choose.
There are a ton of things you can do that, frankly, I don’t even begin to understand. For those of you who have a deep knowledge of the technical side of things, it’s a playground.
But here I want to just talk about one feature: caching.
In case caching is new to you, here’s a brief explanation of how it works. Ordinarily, when people visit your site, the content will be generated and loaded from the servers of your hosting service. Pages have many different elements (including scripts, images, and html), and it can take significant resources for the server to put these elements together, execute code, and serve the results to your end user.
Caching involves pre-fetching page content and storing it for more rapid retrieval. Sometimes the speed is a function of storing copies of the data closer to where it will be accessed; sometimes it is more a function of storing it in faster retrieval systems.
In any case, the point is to allow your site to load more quickly for visitors to give them a better user experience.
There are lots of caching plugins available for WordPress. Some are free, some are paid. Moreover, hosting providers like Siteground include their own, built-in caching applications.
You can set up Cloudflare to cache your page content for free.
Before I explain how, though, let me show you why you might want to.
I have another site I’m developing hosted on Siteground. When I use GTmetrix to analyze speed metrics with no caching enabled, here’s what I get. (For all the examples that follow, I’ve run the test three times and averaged the scores.)
Time to first byte (TTFB): 753 milliseconds
This is the time between when a user’s browser requests a page and when it receives the first byte of information from the server.
First contentful paint (FCP): 855 milliseconds
This is when the first part of the page becomes visible to the user.
Largest contentful paint (LCP): 1.37 seconds
This is when the largest page element, perhaps the hero section for instance, is fully rendered.
Page fully loaded: 1.87 seconds
Those numbers, by the way, aren’t bad. You might find it interesting to go plug in your own site (or one you’re familiar with) into GTmetrix to give yourself something to compare these numbers with.
So how much better do things get with Cloudflare? When I flip the switch and turn on Cloudflare caching for my site, here are the numbers:
TTFB: 53 milliseconds
FCP: 164 milliseconds
LCP: 540 milliseconds
Fully loaded: 1 second
These are pretty amazing. You can see the response from the server is way faster and the user is going to start seeing content in a fraction of a second.
Convinced? Okay, let’s see how to set it up.
Setting up caching with Cloudflare
To get Cloudflare’s powerful caching working to speed up your site, you’ll need to complete 3 steps:
- Create a Cloudflare account
- Proxy your domain
- Configure caching
Here’s how to do each one.
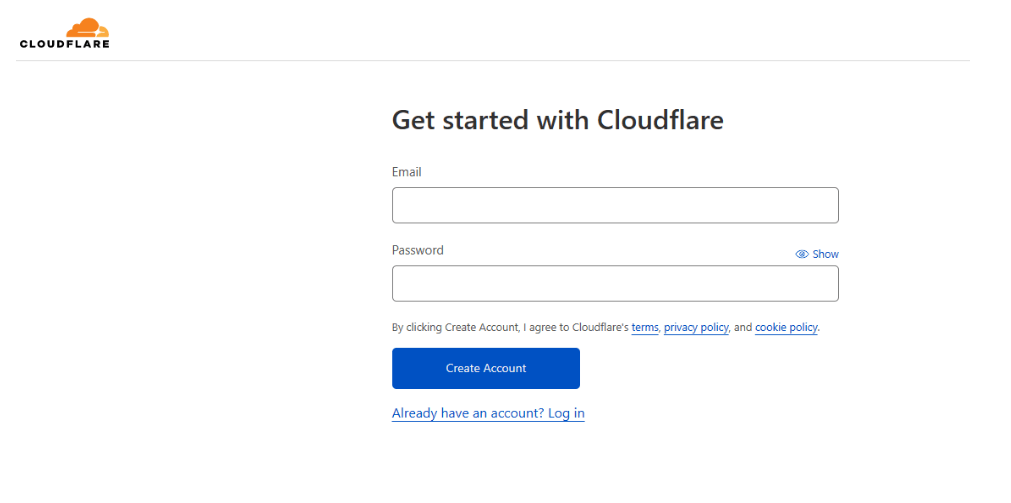
1. Create a Cloudflare account
It doesn’t cost anything to set up your account. Just go to Cloudflare’s homepage and click on “get started for free.” It’s pretty obvious what to do next.
2. Proxy your domain
This step is a bit more complex. I want to just give you the big picture here and then point you to an excellent guide Cloudflare has written that will walk you through the steps. When I did this the first time, I had no idea what I was doing — and managed just fine.
Basically, what you are going to do is allow Cloudflare to route all traffic to and from your domain through its servers.
To set this up, your first need to disable NDSSEC, a security measure, wherever your domain name is registered. (That would usually be where you purchased it, often your web host.) You can find detailed instructions here.
Then you need to click on “websites” from the main dashboard of Cloudflare and click “Add a Site.”
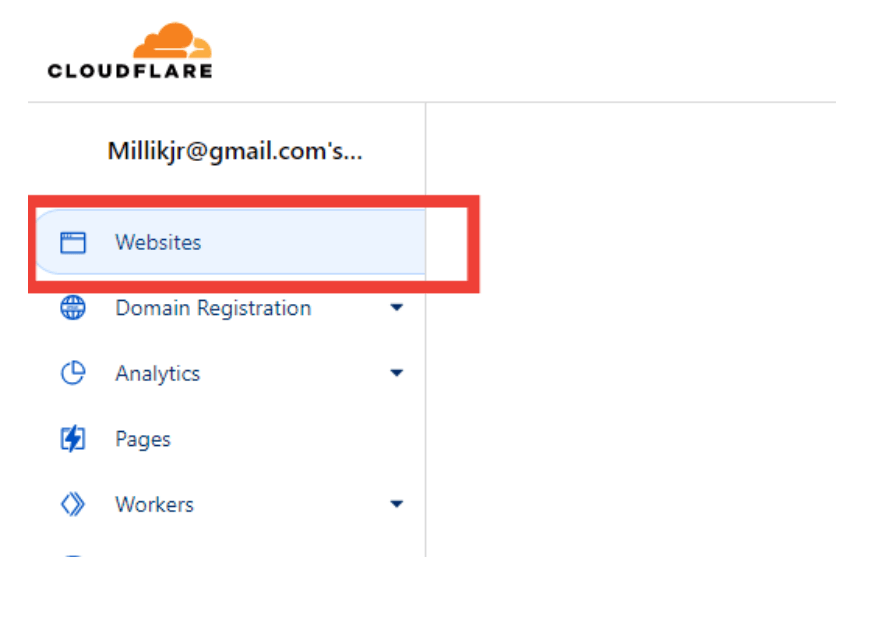
Once you’ve created your account and are logged in, select “Websites” from the lefthand menu.
This guide will walk you through how to take the steps involved.
3. Configure caching
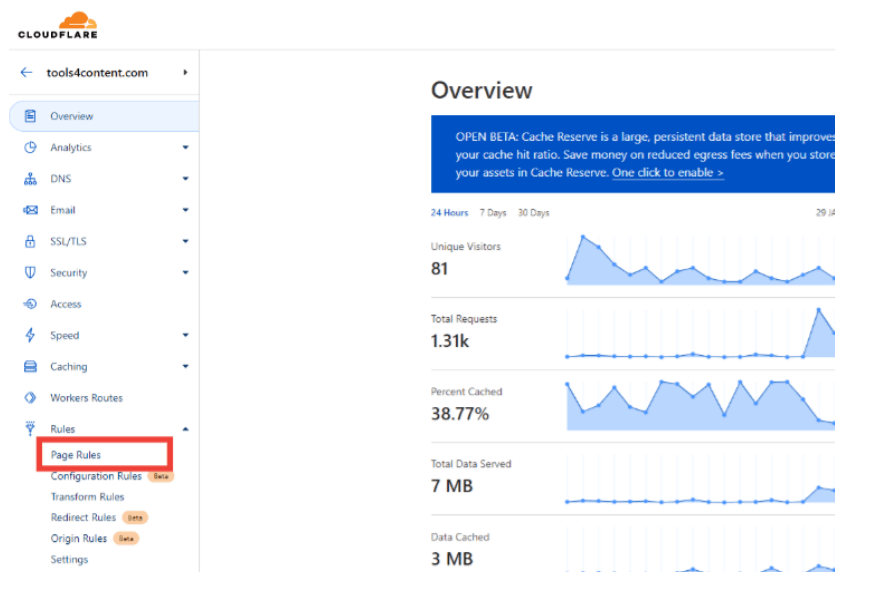
Once you’ve completed the other steps, click on your site from the Cloudflare main dashboard to bring up the site-specific menu. You’ll see a section titled “Rules.” Expand the dropdown and click on “Page Rules.”
Click “Create Page Rule.” You’re going to create a rule that tells Cloudflare to cache everything for all the pages on your site. By default, Cloudflare only caches certain kinds of content. This page rule will make sure you get the maximum benefit out of their caching service.
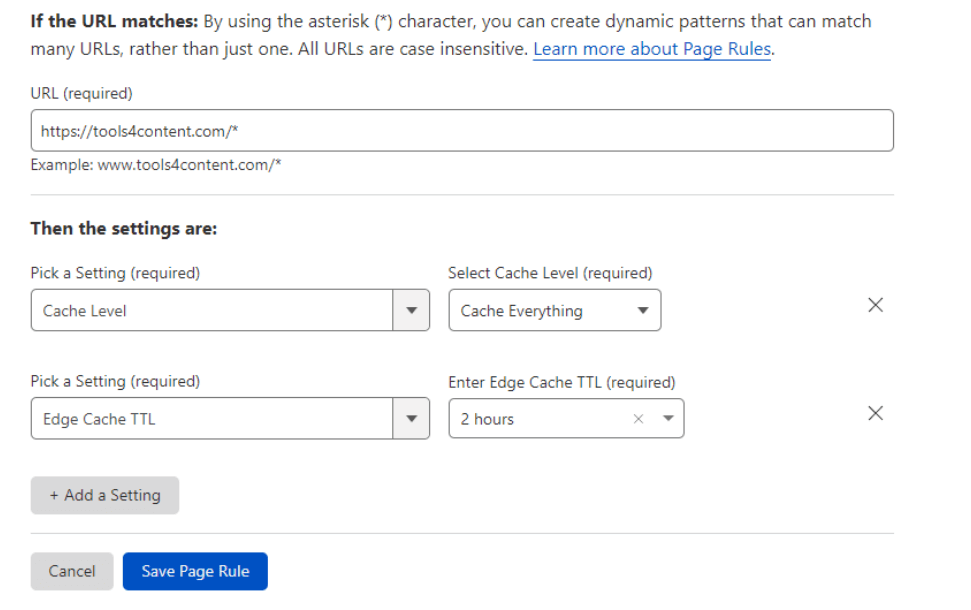
The asterisk in the URL indicates that the rule should apply to every page for that root domain. “TTL” indicates how long material is stored in the cache before refreshing. 2 hours is the minimum; you can make it longer if your content doesn’t change very often.
Once you click “Save Page Rule,” you should be all set.
Note for Siteground users: Siteground has a caching app built in as part of the platform. I just turn it off. It’s not a good idea to use more than one caching app at a time and Cloudflare is just a lot faster.
Conclusion
Your site speed matters. Just like you, I’ve struggled to speed up WordPress and get it loading fast enough, especially on mobile. After trying out various alternatives, I have found the combination of Siteground hosting, Kadence Blocks, and Cloudflare caching delivers outstanding results. The best part? You don’t have to spend anything to use the latter two.
Do you have other recommendations about speeding up WordPress? Share them below.
By the way: some of the links in this post are affiliate links. At no cost to you, I may earn a commission if you sign up for a paid plan with Siteground or Kadence Blocks.


Leave a Reply
Want to join the discussion?Feel free to contribute!