

Yoast Sitemap | How to Create, Edit, and Submit to Google
If you have a WordPress site and use the Yoast SEO plugin, you need to know how to manage your Yoast sitemap. Fortunately, it’s not too difficult. In this blog we’ll learn a bit more about XML sitemaps. We’ll also explain how to use Yoast to view, manage, and customize your sitemap, and how to submit it to Google.
What is an XML Sitemap?
XML is a markup language (in the same way that HTML is a markup language) designed to store and transport data. It stands for eXtensible Markup Language. XML is the language that stores data about the pages that you want search engines to index on your site. Here are 3 key things to know about the relationship between XML, sitemaps, and Yoast.
- XML is a language used to store and transport sitemap data.
- A sitemap is a guide to search engines regarding what pages should be indexed and eligible to show in search results.
- Yoast is a popular plugin used to manage SEO on WordPress sites. Yoast is the tool that we use to manage sitemaps on WordPress sites.
How to Find Your Yoast Sitemap URL?
One of the great things about Yoast is that it automatically creates a sitemap for your WordPress site based on the specific types of pages that are indexed. But it’s not instantly obvious where you’ll find your Yoast sitemap URL. To view your Yoast sitemap take the following 6 steps:
- Log in to your WordPress site
- Look for the “Y” Yoast icon in the left-hand dashboard menu and click it.
- The menu will expand. Now click on “General”.
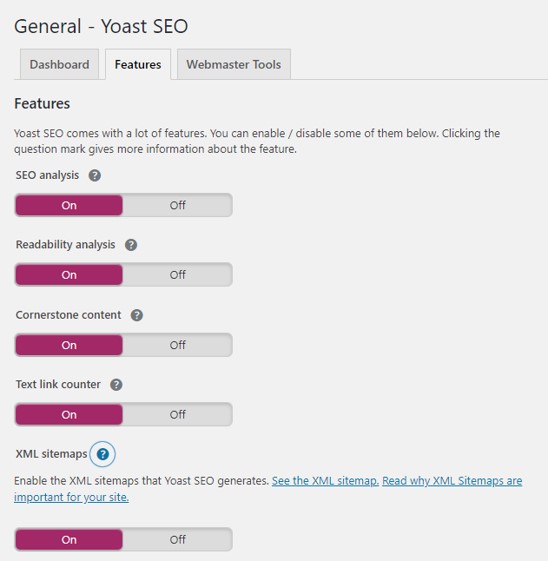
- Access the “Features” tab as shown below.
- Click on the question mark to the right of “XML sitemaps” as shown below.
- Click on the blue link to “See the XML sitemap”
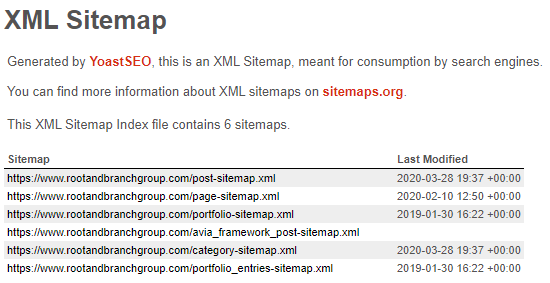
You’ll be directed to a URL that is yourdomainname.com/sitemap_index.xml. This is the sitemap URL that you’ll ultimately submit to Google. Before we make any changes, here is what the sitemap looks like for rootandbranchgroup.com.
If you’d like a video walkthrough, you can see the step by step clicks for viewing, editing, and submitting the sitemap in the 3 minute video linked below:
How to Customize Your Yoast Sitemap
To customize a Yoast sitemap, we turn search engine indexing on or off for different types of content. You do that through the “Search Appearance” menu within Yoast by changing settings for Content Types and Taxonomies. Here’s how we do that.
- Look for the “Y” Yoast icon in the left-hand dashboard menu and click it.
- The menu will expand. Now click on “Search Appearance”.
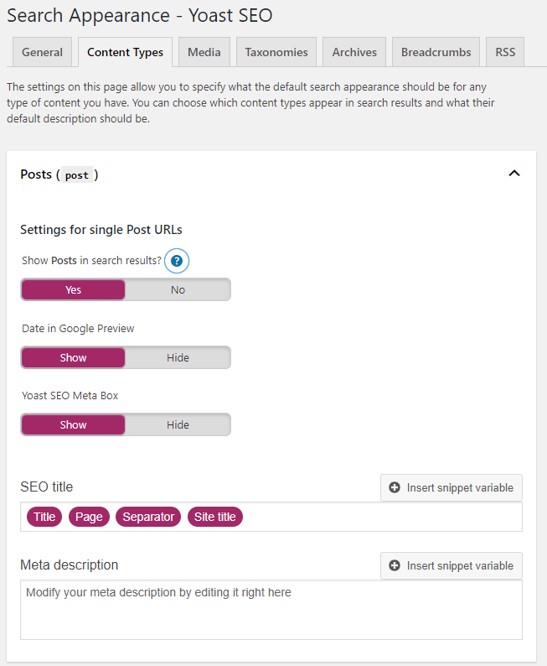
- Access the “Content Types” tab as shown below.
- Expand into each of the different Content Types (Posts shown below) and enable or disable indexing by toggling “Yes” or “No” under “Show Posts in search results?”. Toggle this to “no” to apply noindex tags to all pieces of content within that Content Type and remove them from the XML sitemap. In this case, we want our Posts to be indexed so we’re going to keep this on “Yes”. For anything that should not be in the sitemap, change this to “No.”
- Now click on the “Taxonomies” tab (two to the right of the “Content Types” tab shown below). This is where you can remove Categories and Tags from your sitemap. Note: if you have a strategy for using categories and tags, you should keep them turned on.
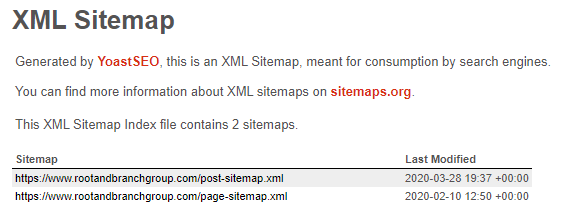
After making all of your changes, you can once again view your sitemap at yourdomainname.com/sitemap_index.xml. Here is what ours looks like now.
How to Submit Your Yoast Sitemap to Google
To submit our Yoast sitemap to Google we need to have the URL of our newly customized sitemap and we need to have our site verified with Google Search Console. Then, we simply click on the “Sitemaps” section within Search Console, enter the URL for our XML sitemap, and hit the Submit button. Here are those individual steps.
- Log in to your Search Console property at search.google.com. Note, if you haven’t verified your site with Search Console, you will need to do this first.
- Click on the “Sitemaps” menu item on the left-hand side of the Search Console navigation.
- Copy your sitemap URL (yourdomainname.com/sitemap_index.xml) and paste it into the field below “Add a new sitemap” as shown in the first image below.
- Hit submit. You will see a message from Search Console that says “Sitemap submitted successfully.”
- You will now see your sitemap in the submitted sitemaps as shown in the second image below.

Image 1 of 2: submit sitemap to google
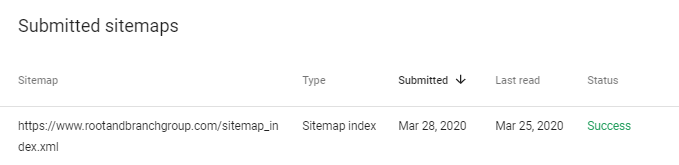
Image 2 of 2: sitemap submitted successfully
Your Yoast Sitemap is Done! Now Continue with Other SEO Efforts
Your sitemap is now customized and submitted. Congratulations! Now continue with some other SEO efforts, like learning about 8 trends shaping SEO in 2022.
For more work in Search Console, learn how to disavow any toxic backlinks that might be harming your SEO presence.
If you want to level up your digital analytics measurement game, you can review 7 things you should be doing with Google Analytics in 2022 or learn about GA4 vs. Universal Analytics. And if we can help with any hands on training or support, feel free to get in touch.


My Yoast sitemap is only showing one post! I tried clearing the caches but no luck.
Hmmm…I just checked your sitemap (append /sitemap_index.xml to the end of your URL) and see a post.sitemap, a page.sitemap, and a category.sitemap there. If you’re only seeing one blog post that is indexed, I’d check out Google Search Console (URL inspection) and see what Google says when you check out some of the blog posts that are not showing up.
Thanks Zack. If you take a look at the post sitemap, you’ll see just one post URL although I have more posts live in the blog.
I used the URL inspection tool in Google Search Console, and I found the URLs “crawled, but not indexed” and “available to Google”.
Just found out the issue. I was using the advanced tab to set a specific canonical URL for each post. I just deleted the URL and every thing was updated just fine. Thanks Zack.
I’m glad to hear it!
Would there be a reason why Yoast places /cart in the sitemap, and /checkout?
Hello Rien. If those pages are set to be indexed, Yoast would put them in the sitemap. I’d recommend confirming that they aren’t accidentally set to index.
Also, you can update your robots.txt file (using Yoast) to tell search engine crawlers they shouldn’t be on those pages on your site. Here’s a blog with more info on that if you’re interested: https://www.rootandbranchgroup.com/edit-robots-txt-wordpress/
Best of luck to you!
Hello
My website
https://mekawyat.com/
Has a sitemap issue
It appears white in google and never updated since 22 April
All my new posts since that time is not indexed at all
Can you please help me to solve it
I’m using yoast premium
I would suspect this is unrelated to Yoast. When you say it appears white in Google, are you talking about Google Search Console or the Google search engine results page?
I’d recommend you check out the Coverage report within Google Search Console (Index -> Coverage) and toggle to see your “Valid” pages. Look to see how many are “submitted and indexed” and how many are “Indexed, not submitted in sitemap”. I had an issue where all of my indexed pages were showing as “Indexed, not submitted in sitemap” despite the fact that they were submitted in the sitemap! Very frustrating. If that sounds like it could be similar to you, I’m actually making a YouTube video to document the process I went through to fix it. It should publish next Wednesday. If you’re interested, just search for root and branch digital marketing on YouTube and you’ll find it.
I wish you all the best.
Thanks for this content.
One question: Where should I put the filter? Everyone on the internet gives the filter, but not where it should be added. Or perhaps I’m simply stupid and missing something.
Thank you.
Hey there, Andy. Can you clarify what you mean by “filter”? I re-read the article and I don’t think I had used that word so I can’t quite place what specific element you’re referring to. If you can do that, I’d be happy to try and help a bit more.
Thanks,
Zack
Thank you! was looking for this.